
HubSpot Forms Configuration
One Click Setup
Create HubSpot forms from Surface and start syncing partial & complete submissions
One Click Setup creates two HubSpot forms for you, one for complete submissions and one for partial ones, and starts sending submissions to them.
Step 1: Authenticate with HubSpot
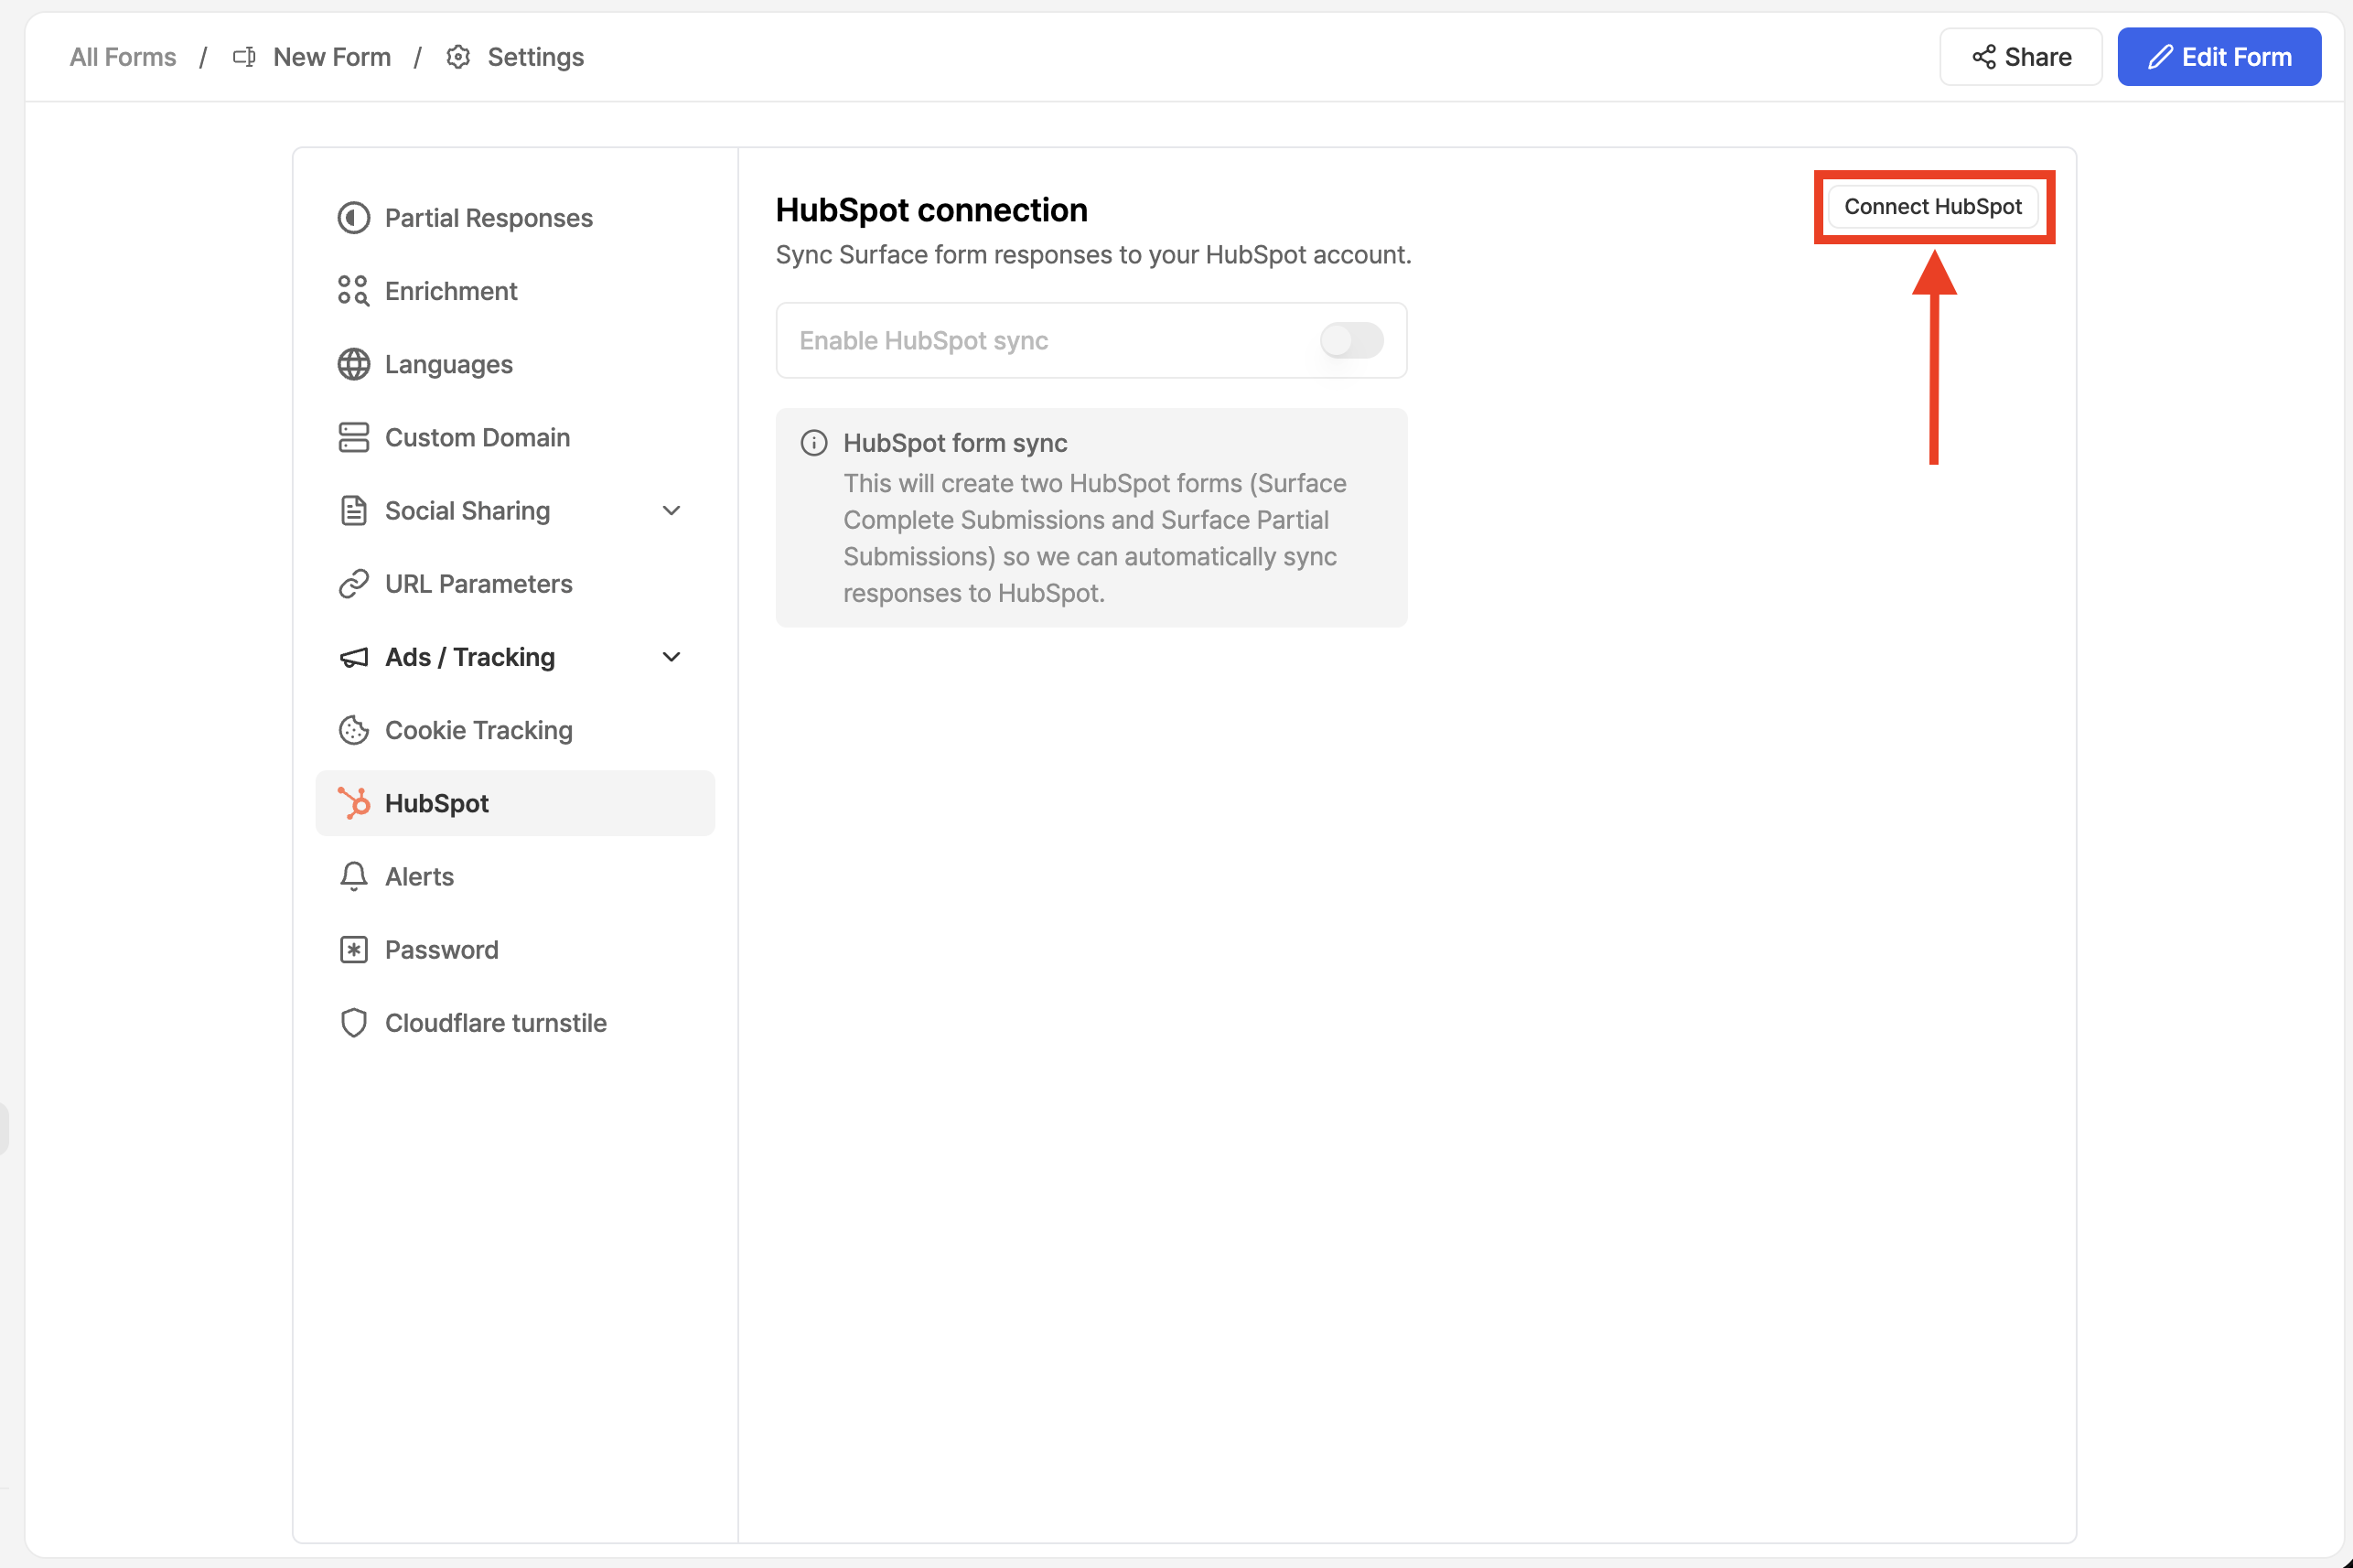
- Go to Form Settings → HubSpot
- Click on Connect HubSpot if you're not already authenticated
- Follow the on-screen instructions to authenticate
- Select your HubSpot organization when prompted
- Accept the necessary permissions to complete the connection
Step 2: Add Surface Domain to HubSpot
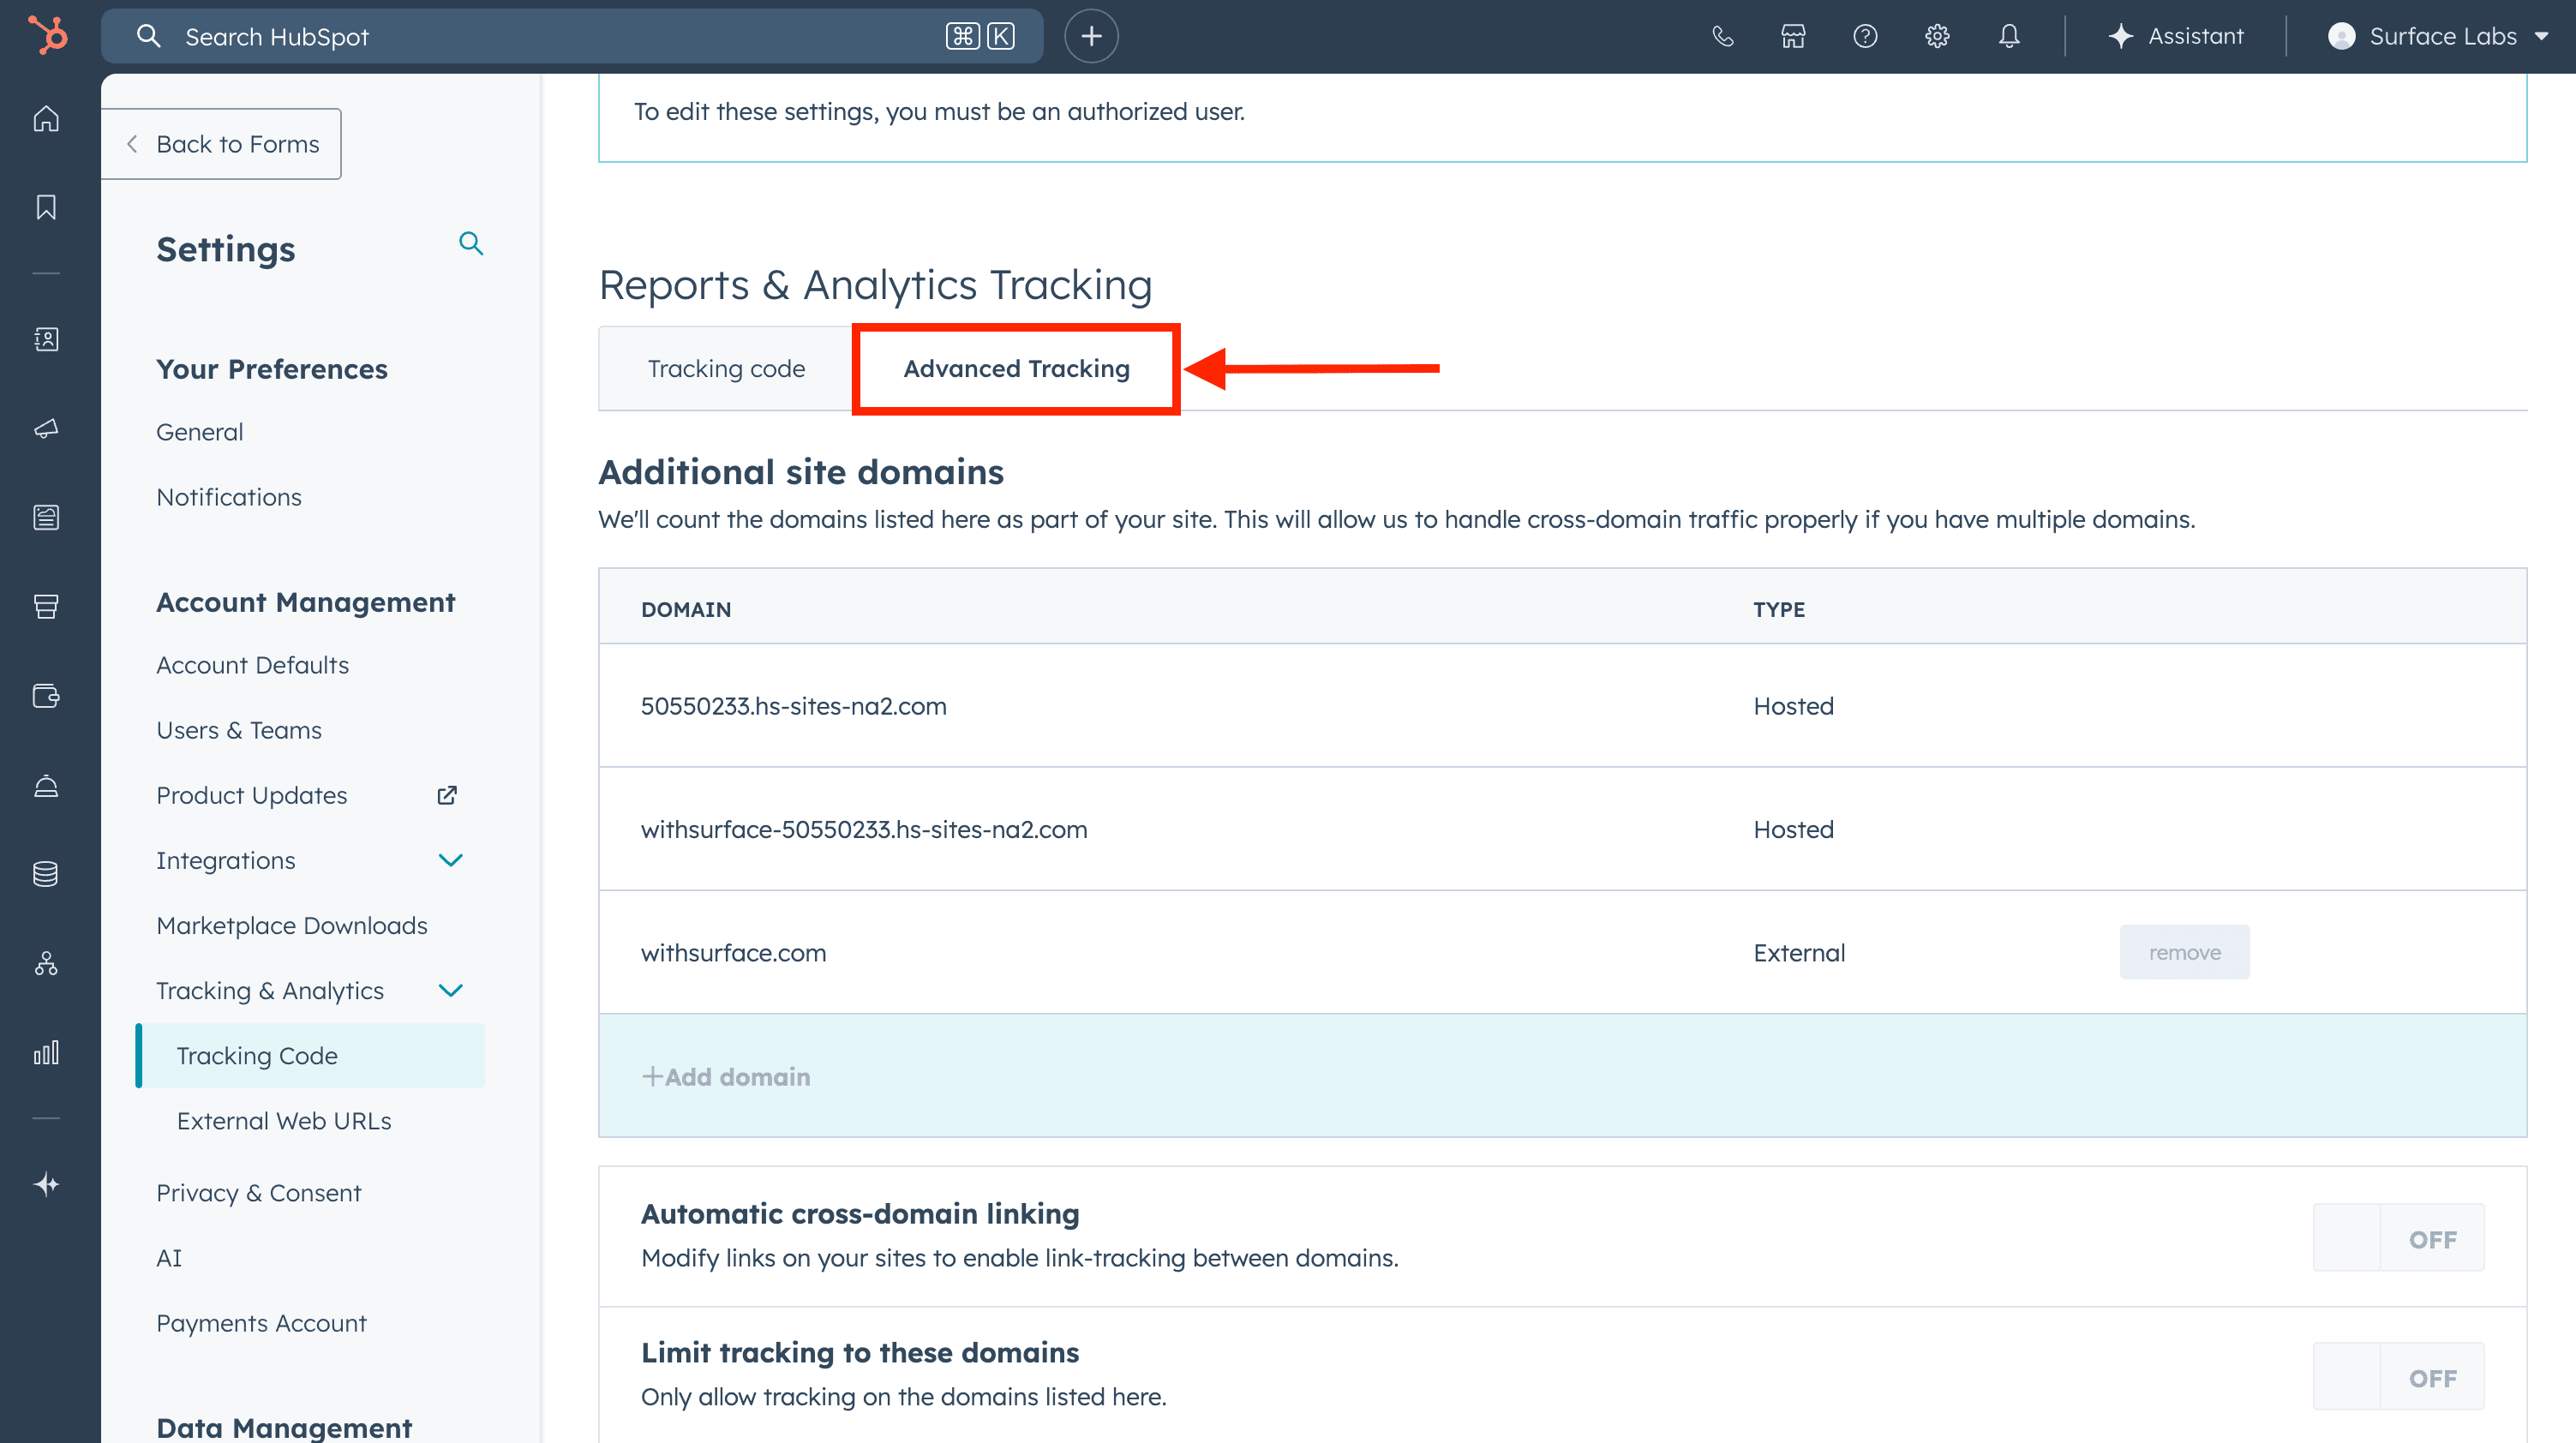
To enable proper tracking and form submissions, add the domain that serves your Surface form to your HubSpot account:
- In your HubSpot account, navigate to Settings → Tracking & Analytics → Tracking Code
- Click on the Advanced Tracking tab
- Under Additional site domains, click + Add domain
- Enter
forms.withsurface.com, or enter your verified custom domain if the form uses one - Click Save
Step 3: Enable HubSpot Sync
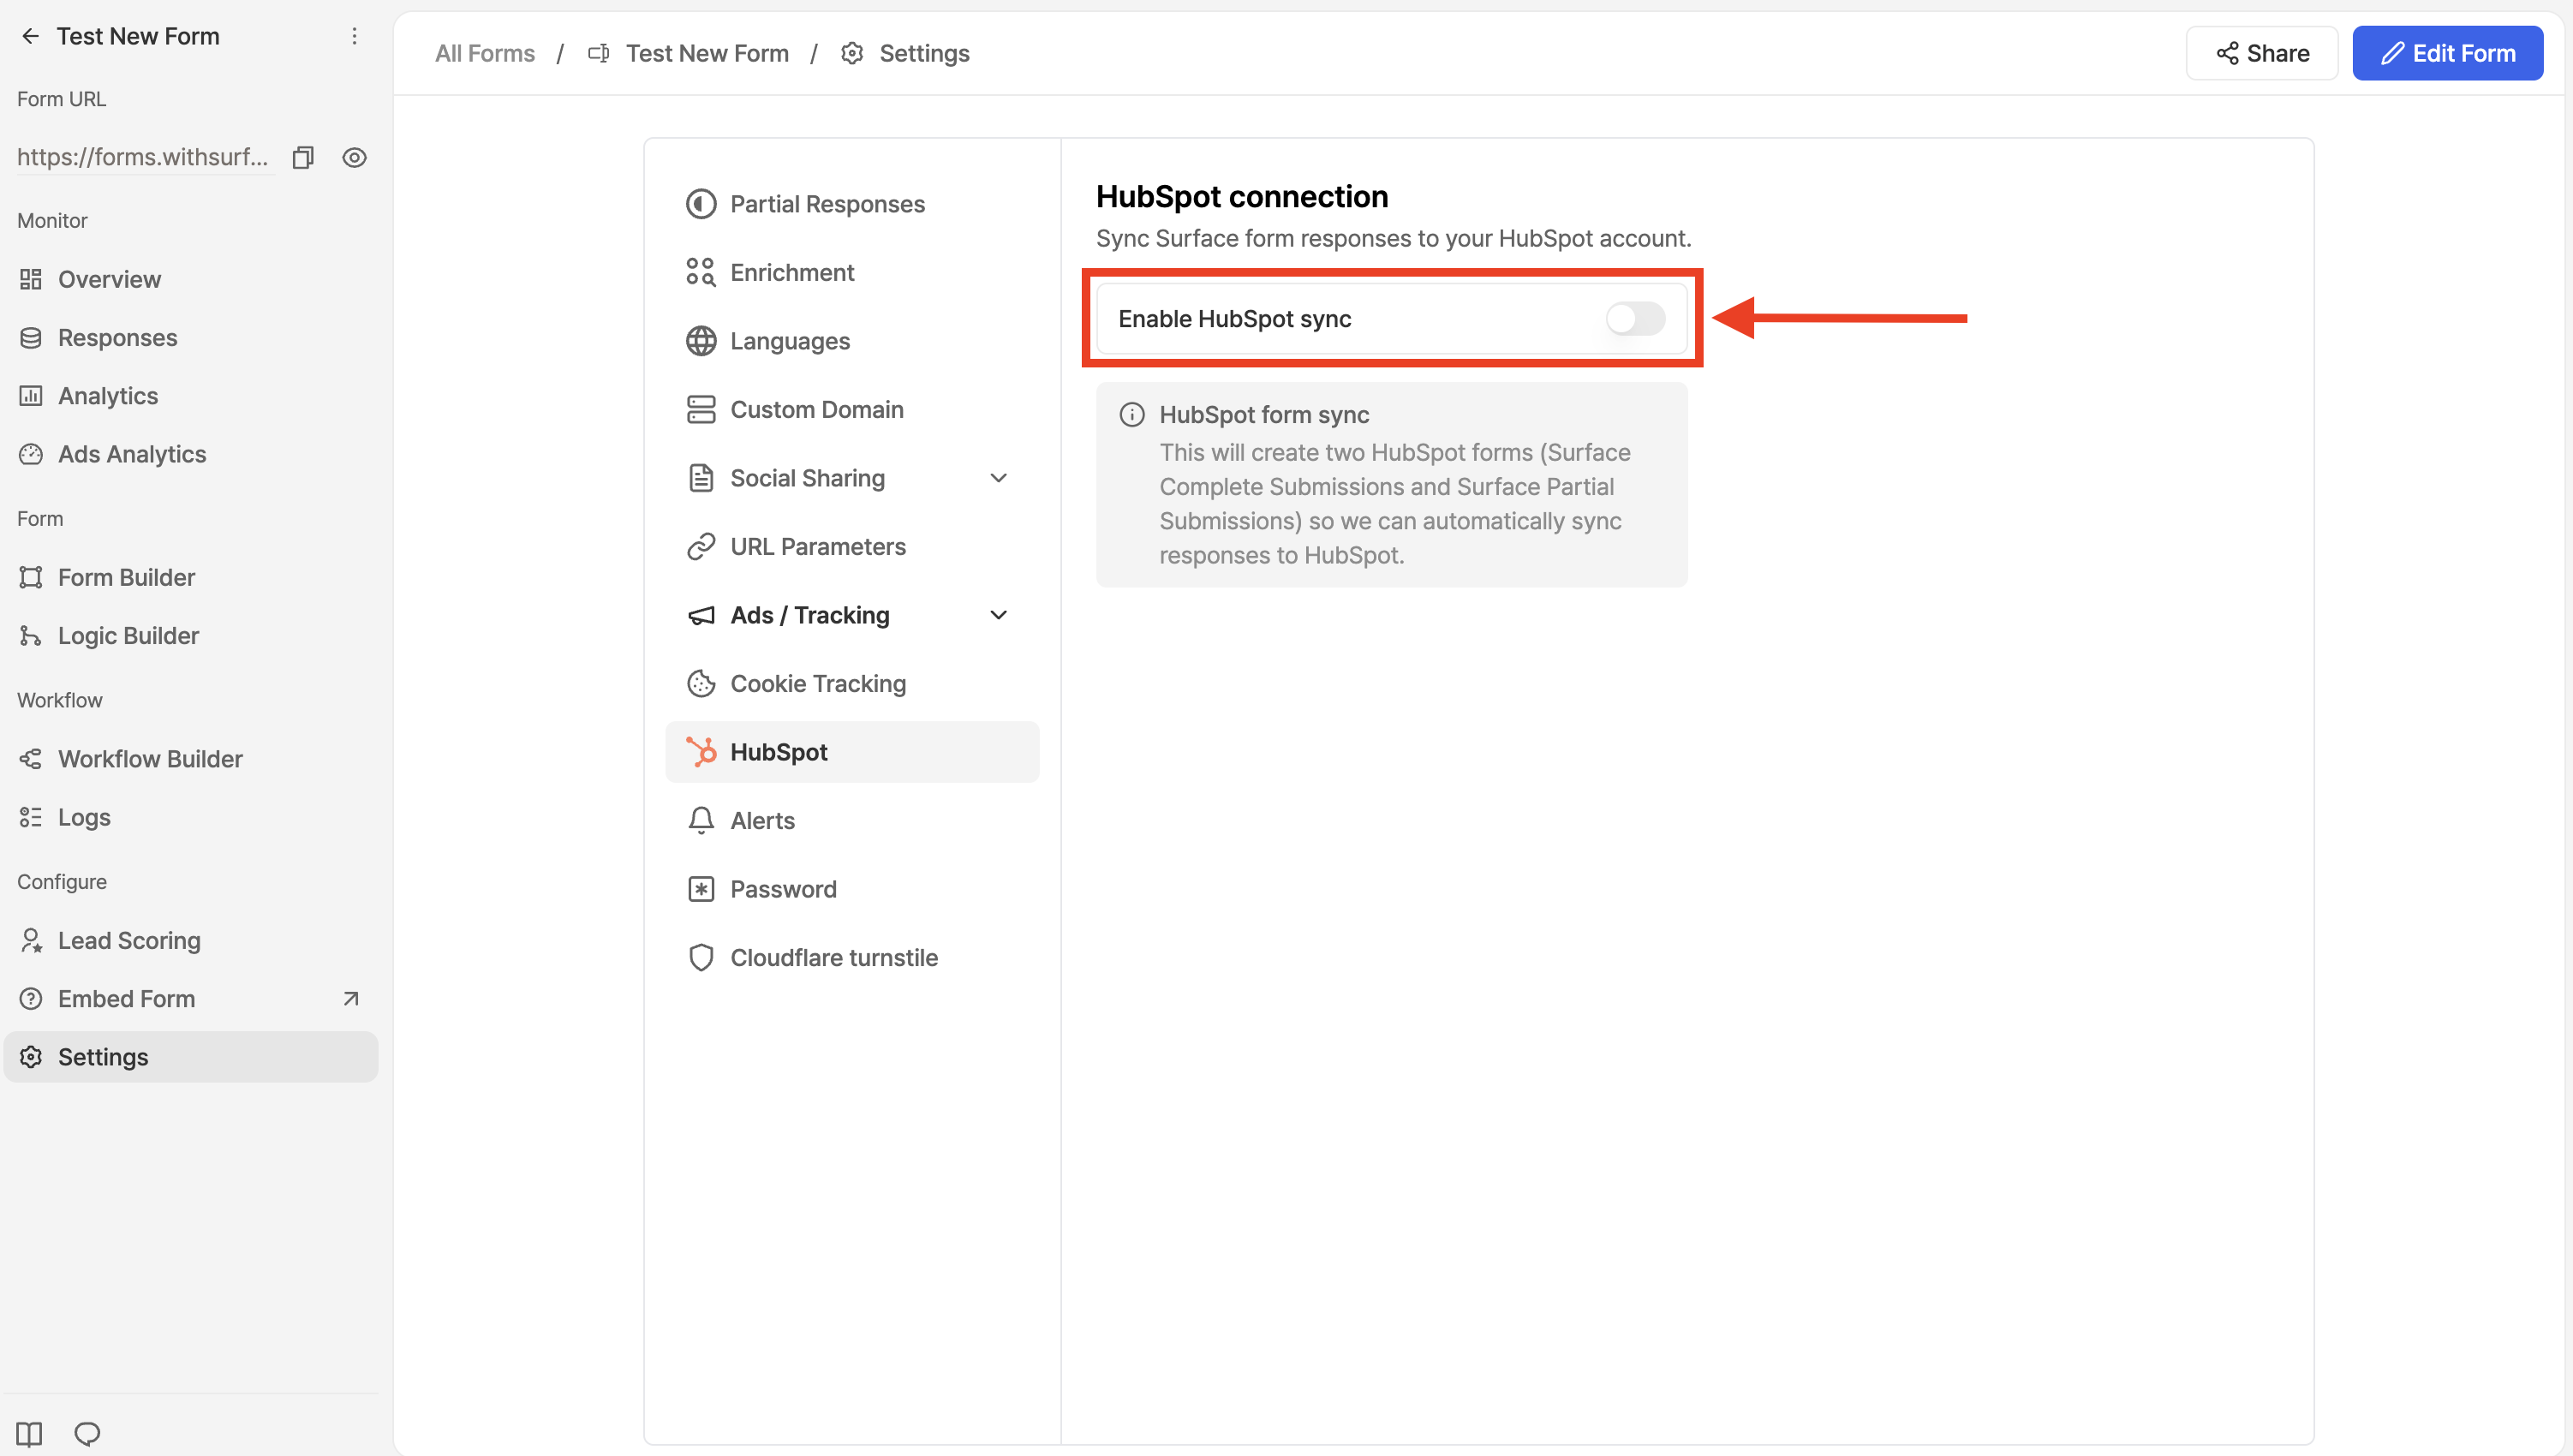
- Under HubSpot Connection, toggle on Enable HubSpot Sync
- Surface will automatically:
- Create a form in HubSpot for finished submissions
- Create a form in HubSpot for incomplete submissions
- Start syncing form submissions to HubSpot
Next Steps
- HubSpot Tracking - Configure HubSpot tracking to properly track UTMs, first landing page, and lead sources
Ready to Get Started?
See it on your own site, or open the app and build the first form.