
Step 3: Event-Based Email Campaigns
Create event-triggered campaigns for partial and completed form submissions with customizable follow-up emails and delays
In this step, you'll create two event-triggered campaigns in Customer.io—one for partial form submissions and one for completed submissions. Each campaign will send a series of follow-up emails with customizable delays between them.
Create the Partial Submission Campaign
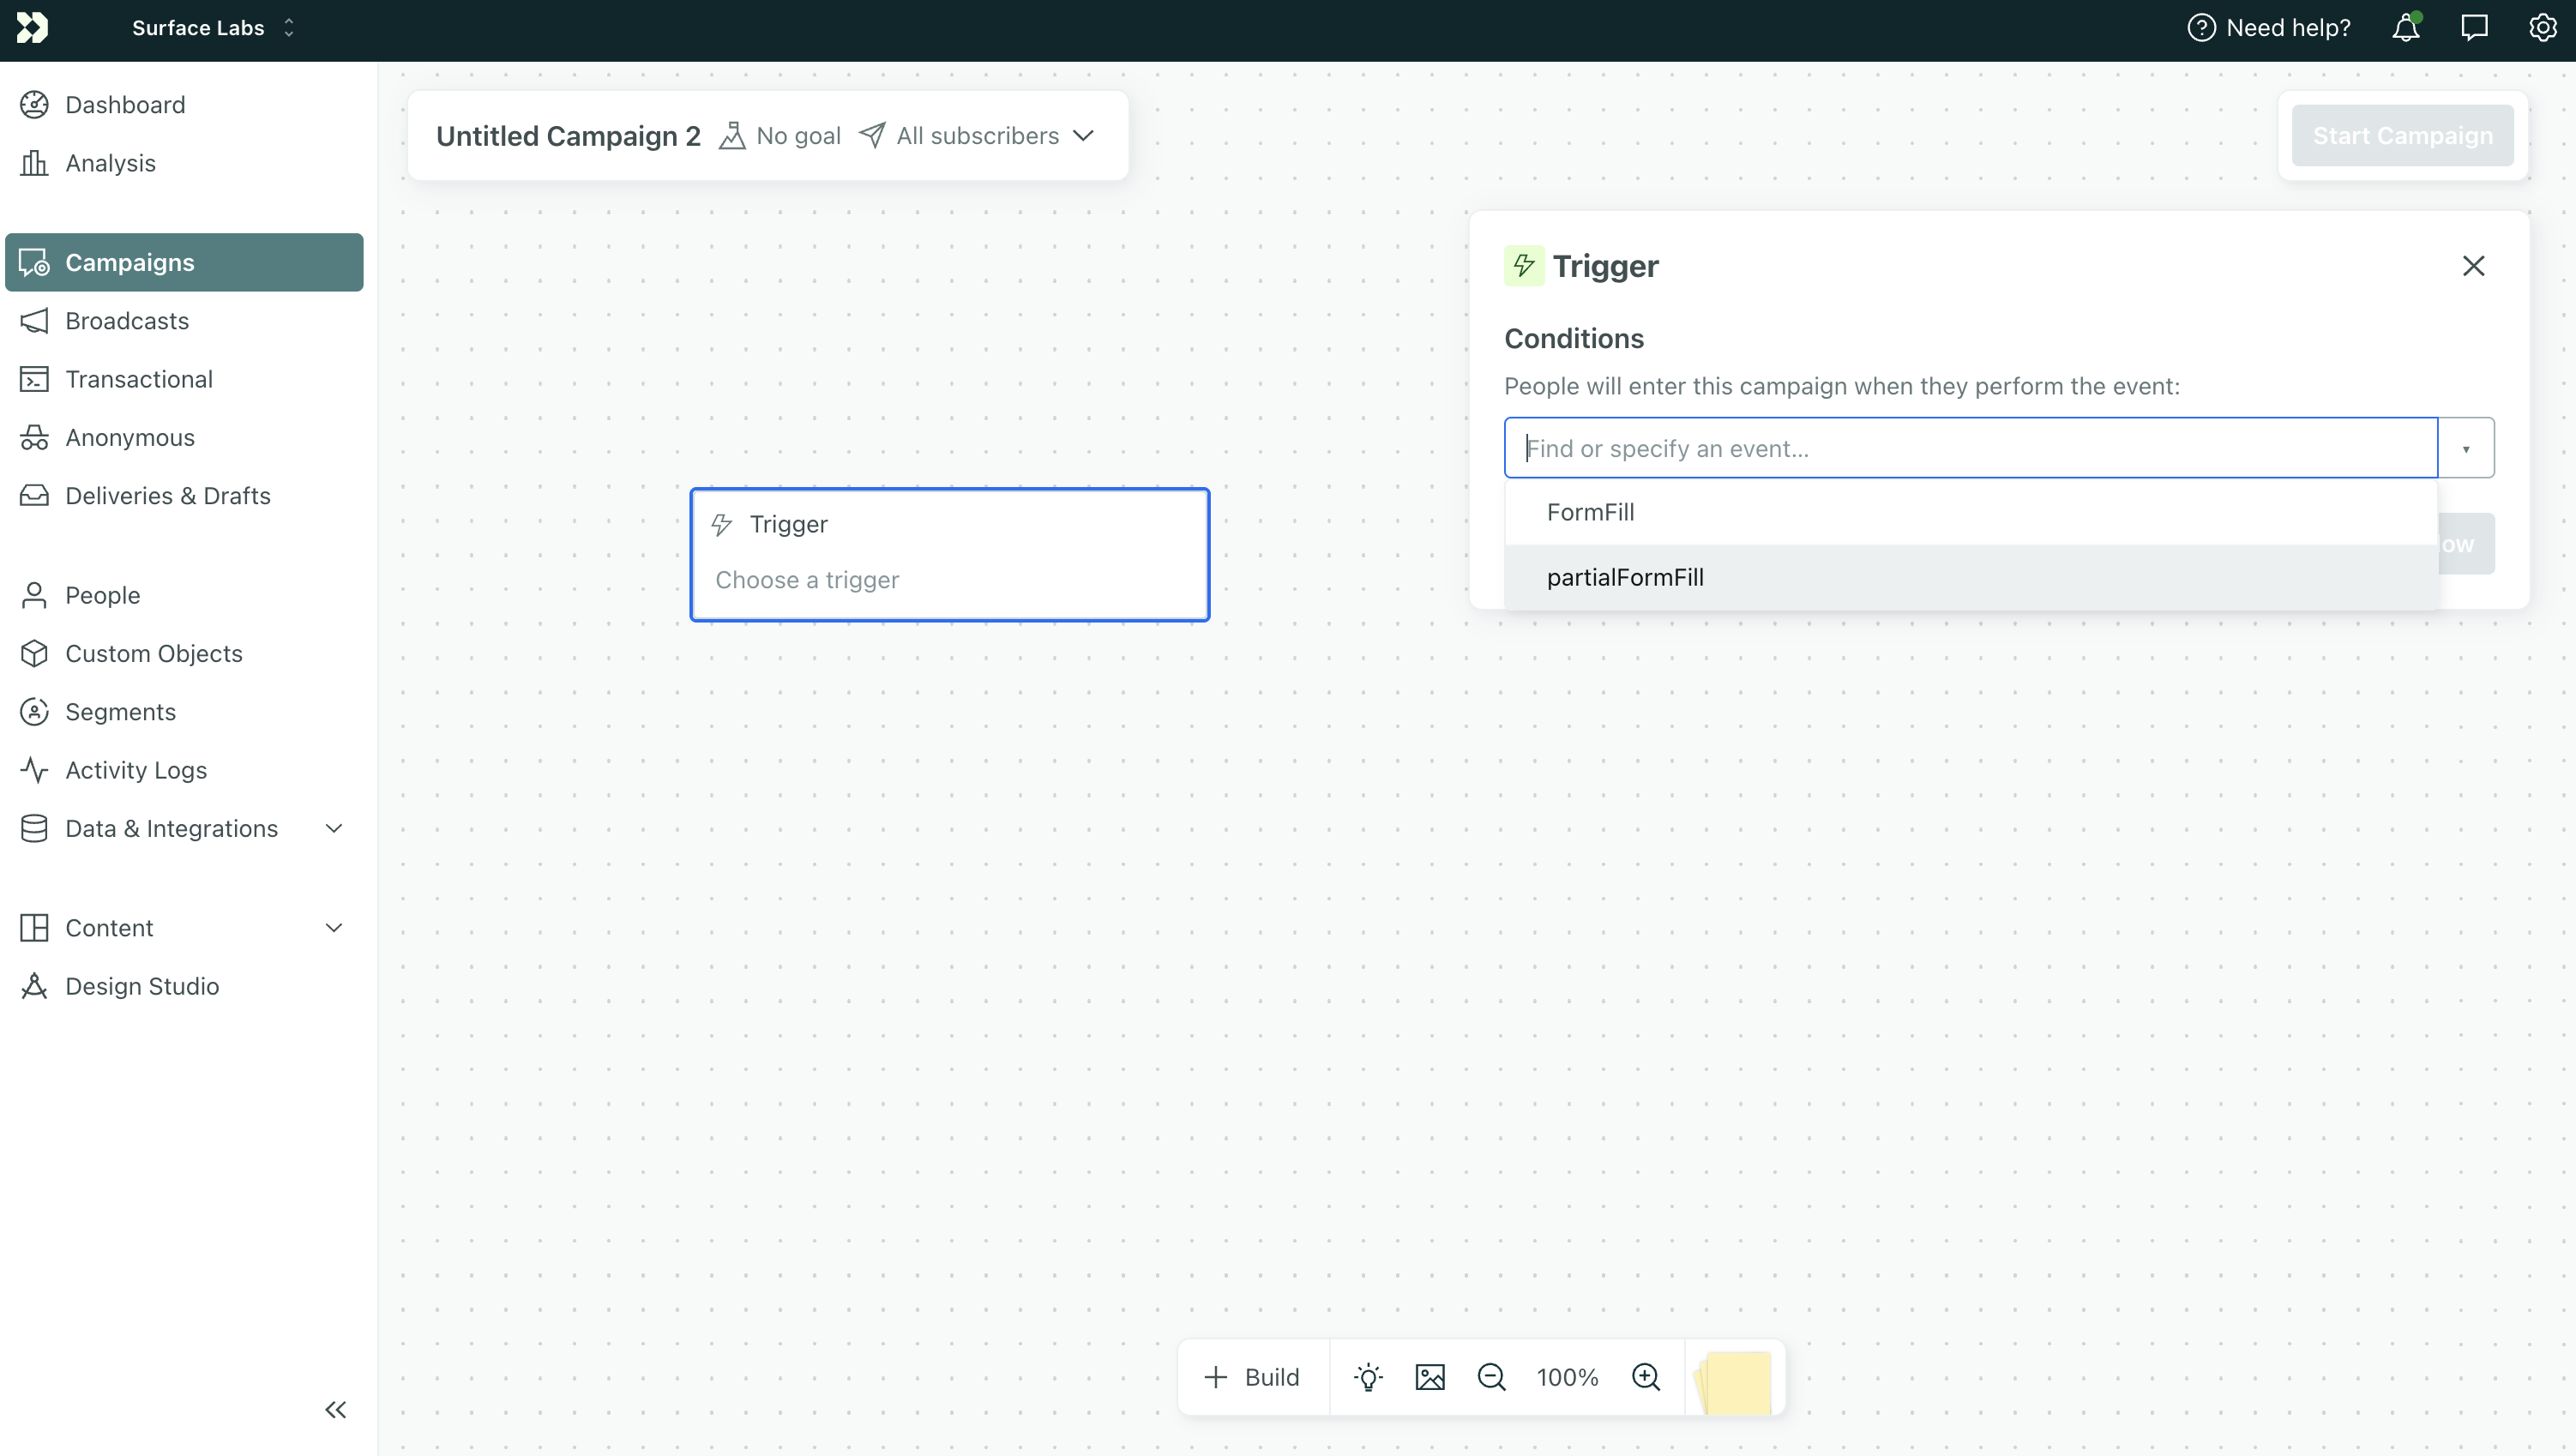
- In Customer.io, go to Campaigns and click Create Campaign
- Click Event as the trigger type
- Configure the trigger:
- Event name:
partialFormFilled(must match the event from your partial webhook campaign in Step 1) - Workspace: Select the workspace where your leads are stored
- Add any filters if needed (e.g., segment, attribute)
- Event name:
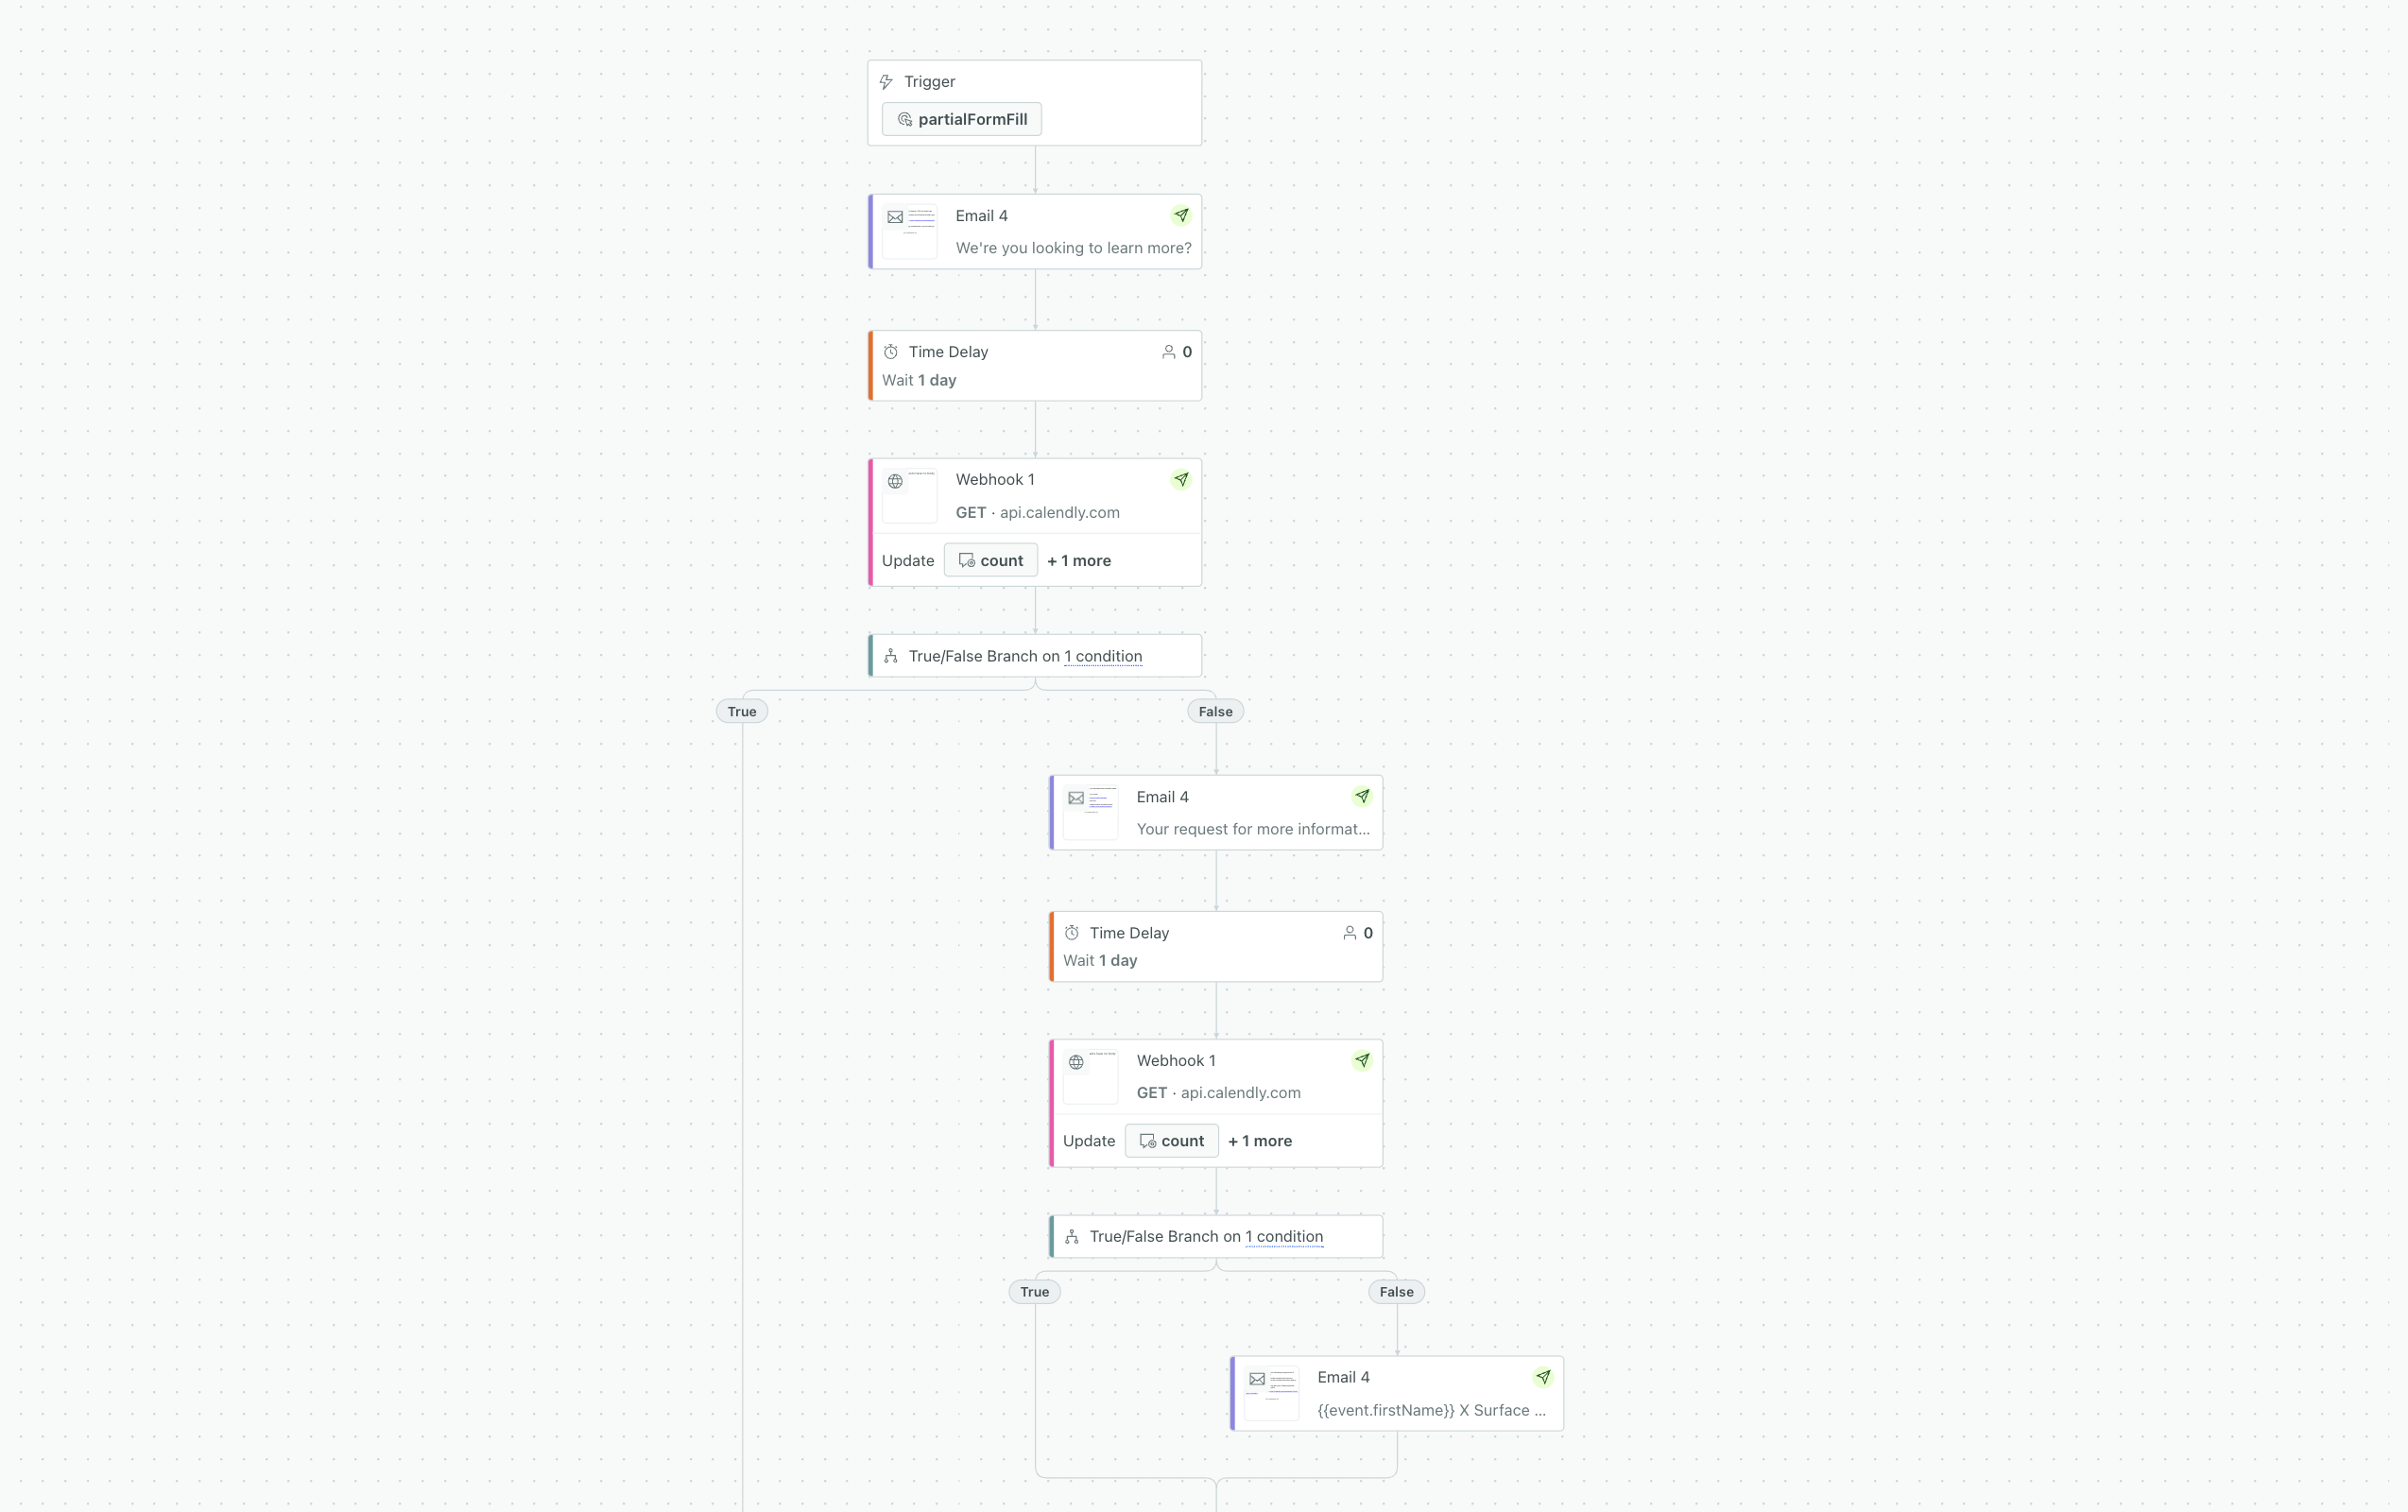
Build the Email Sequence
Add your follow-up emails and delays to the campaign workflow:
Add an Email block as the first step. This sends immediately when the person enters the campaign.
Add a Delay block. Set the delay (e.g., 2 days, 3 days) before the next touchpoint.
Add a Send and receive data (webhook) block that checks Calendly. If the meeting is booked, the person exits. Otherwise, continue. See Step 4: Calendly Meeting Check.
Add another Email block. This sends only if the person didn't book a meeting.
Add another Delay → Webhook (Calendly check) → Email. Repeat for as many follow-ups as you want.
Create the Completed Submission Campaign
Repeat the same process for completed submissions:
- Create a new campaign with Event trigger
- Set Event name:
formCompleted(must match the event from your completed webhook campaign in Step 1) - Build the same structure: Email → Delay → Calendly check → Email → …
- Use different copy and timing if you want (e.g., shorter delays for completed submissions, since they're more engaged)
Completed leads are typically warmer, so you might use a shorter, more sales-focused sequence. Partial leads may need more nurturing and clear calls-to-action to book a meeting.
Save and Activate
- Review each campaign
- Click Start Campaign for both
- They will trigger when the corresponding events fire from your webhook campaign
Next Step
Add the Calendly meeting check (webhook node) before each follow-up email (after the first). This ensures the campaign exits when a lead books a meeting. See Step 4: Calendly Meeting Check.