
Step 2: Configure Surface Workflow
Set up the Surface Workflow Builder to send form data to Customer.io via webhook when leads submit (partial or completed)
In this step, you'll configure the Surface Workflow Builder to send a webhook request to Customer.io whenever a lead submits your form—whether they complete it or drop off partway through.
Open the Workflow Builder
- In the Surface app, open your form
- Go to the Workflows section
- Click Create Workflow (or edit an existing workflow)
Choose Your Triggers
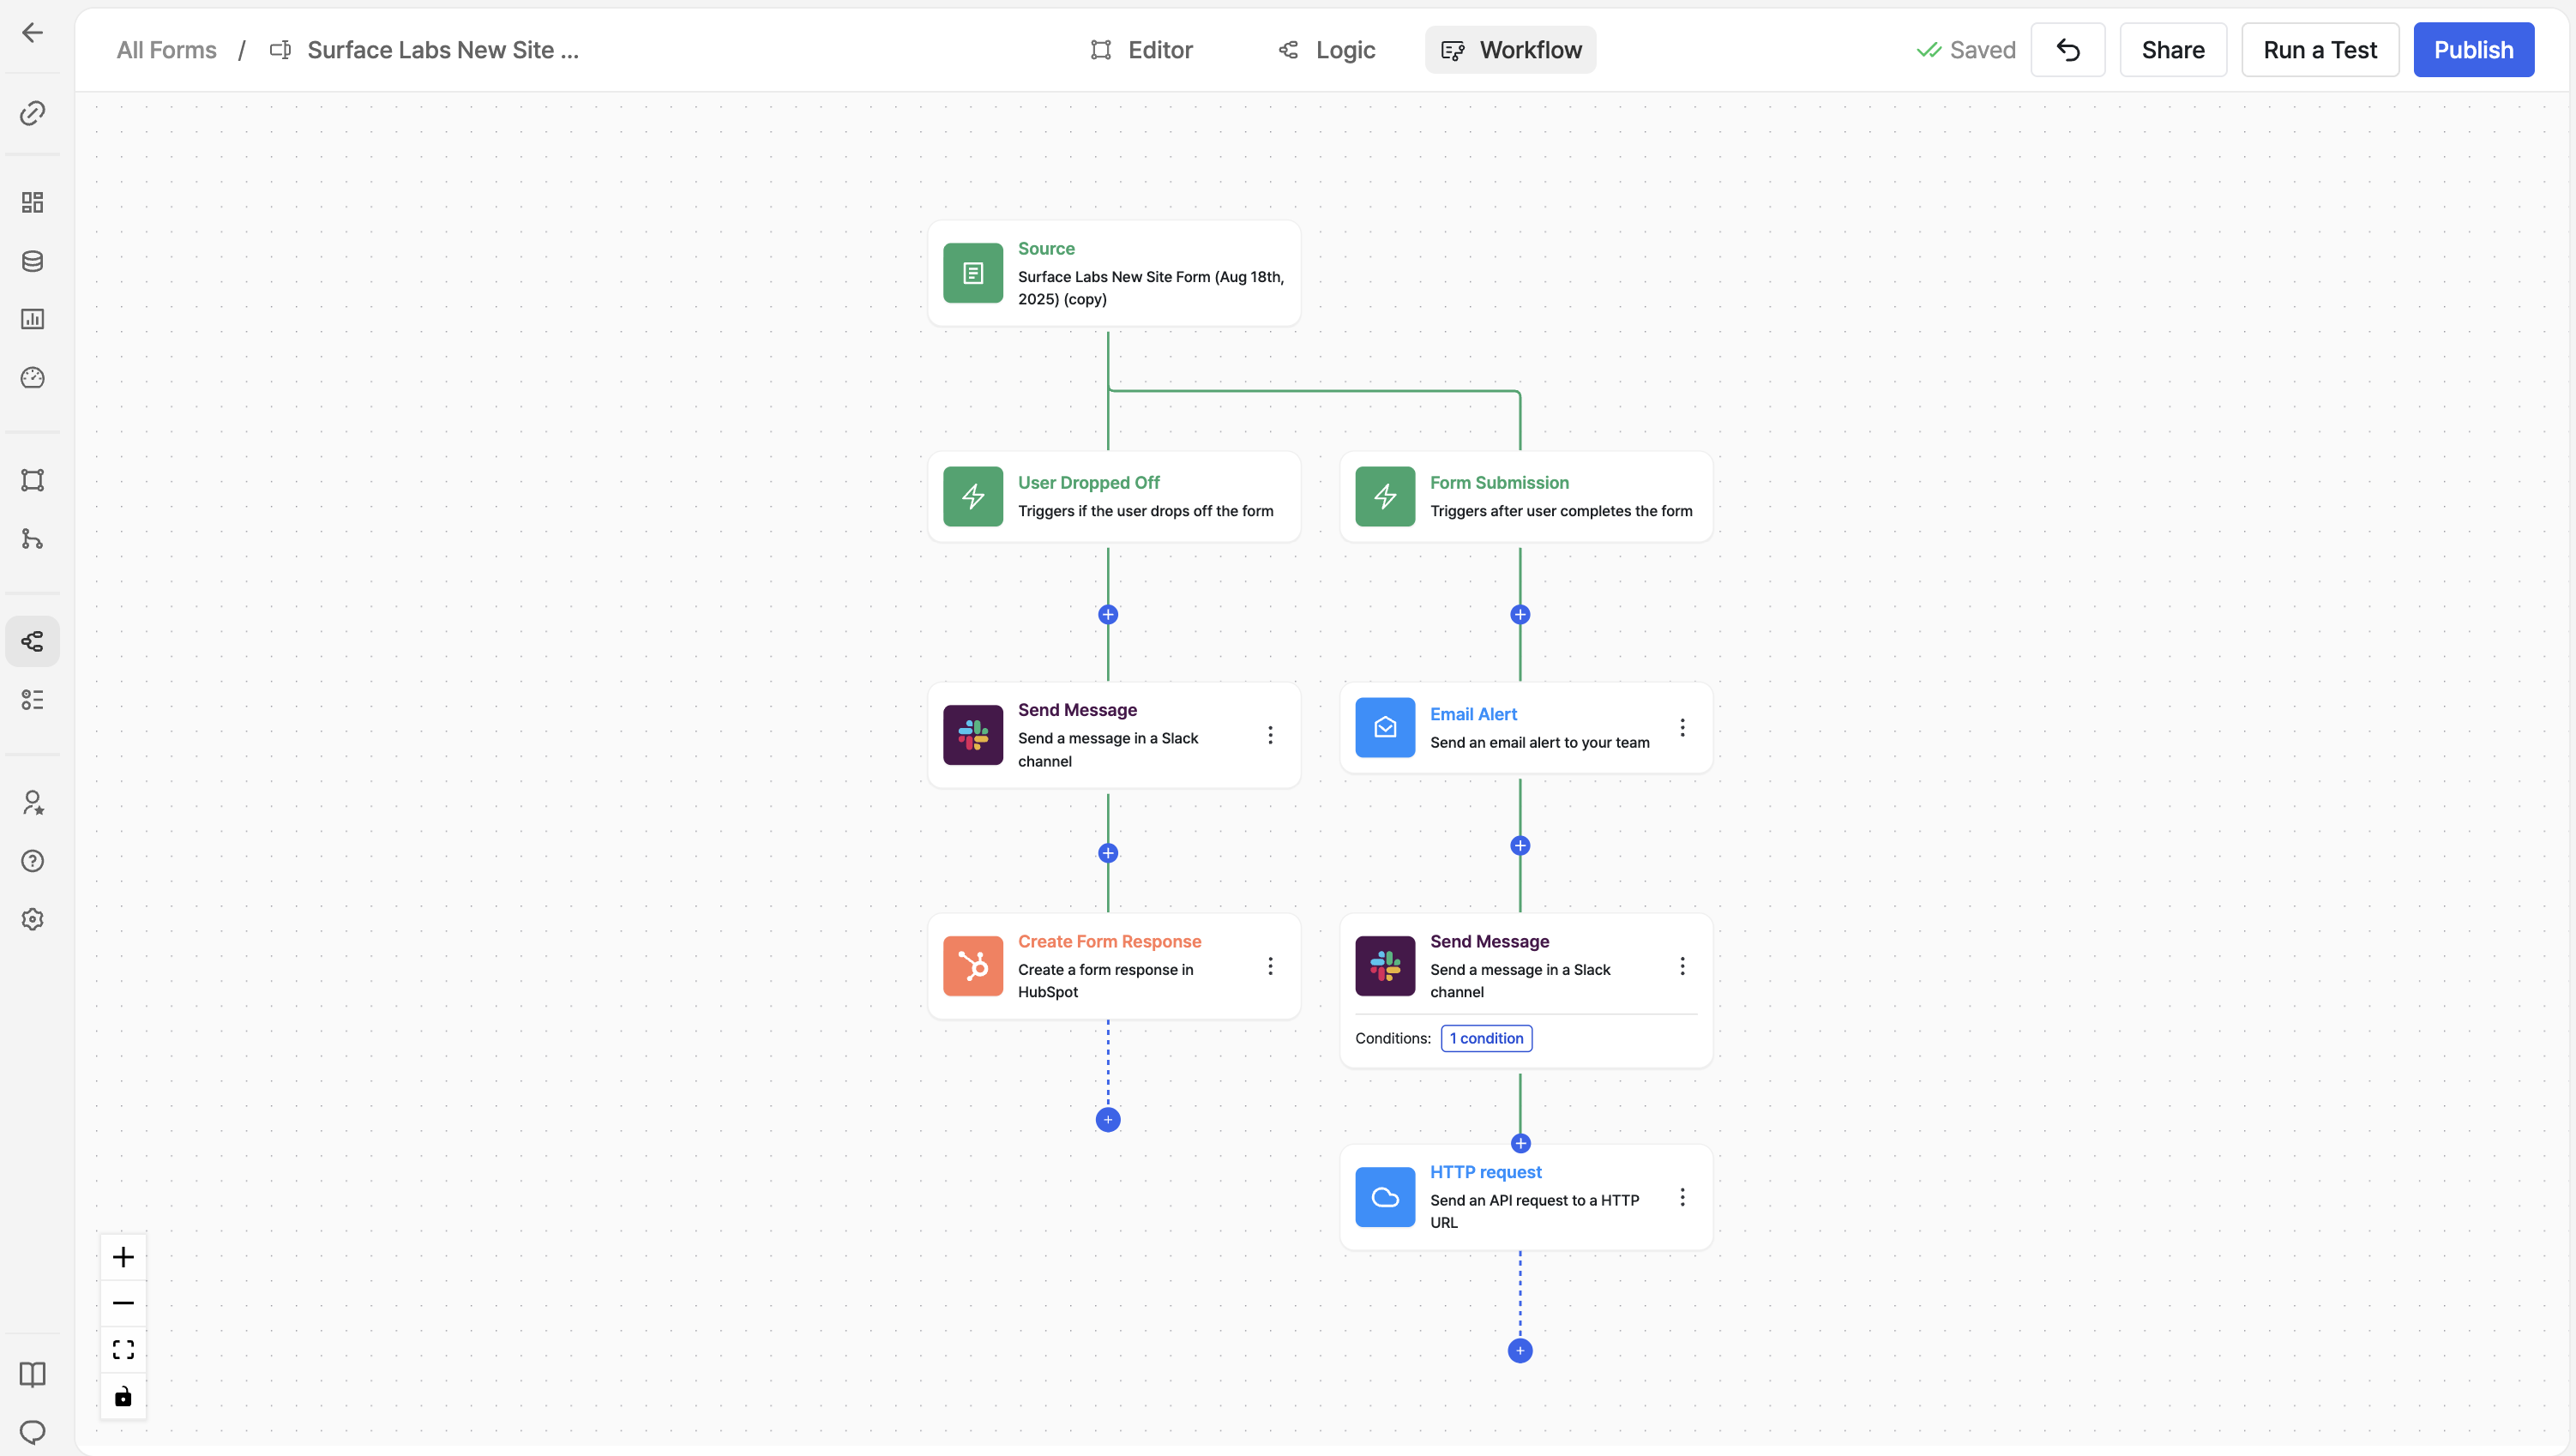
Surface workflows support paths for different triggers, so you can handle both partial and completed submissions in one workflow:
| Trigger | When it fires | Customer.io webhook URL |
|---|---|---|
| Form Submission | When the lead completes the entire form | URL from your completed webhook campaign |
| Dropped Off | When the lead abandons the form mid-way | URL from your partial webhook campaign |
Add both triggers to your workflow. Each trigger path sends to a different Customer.io webhook URL (from Step 1), so the right event fires automatically—no need to pass submission_type in the payload.
Add the HTTP Request Action
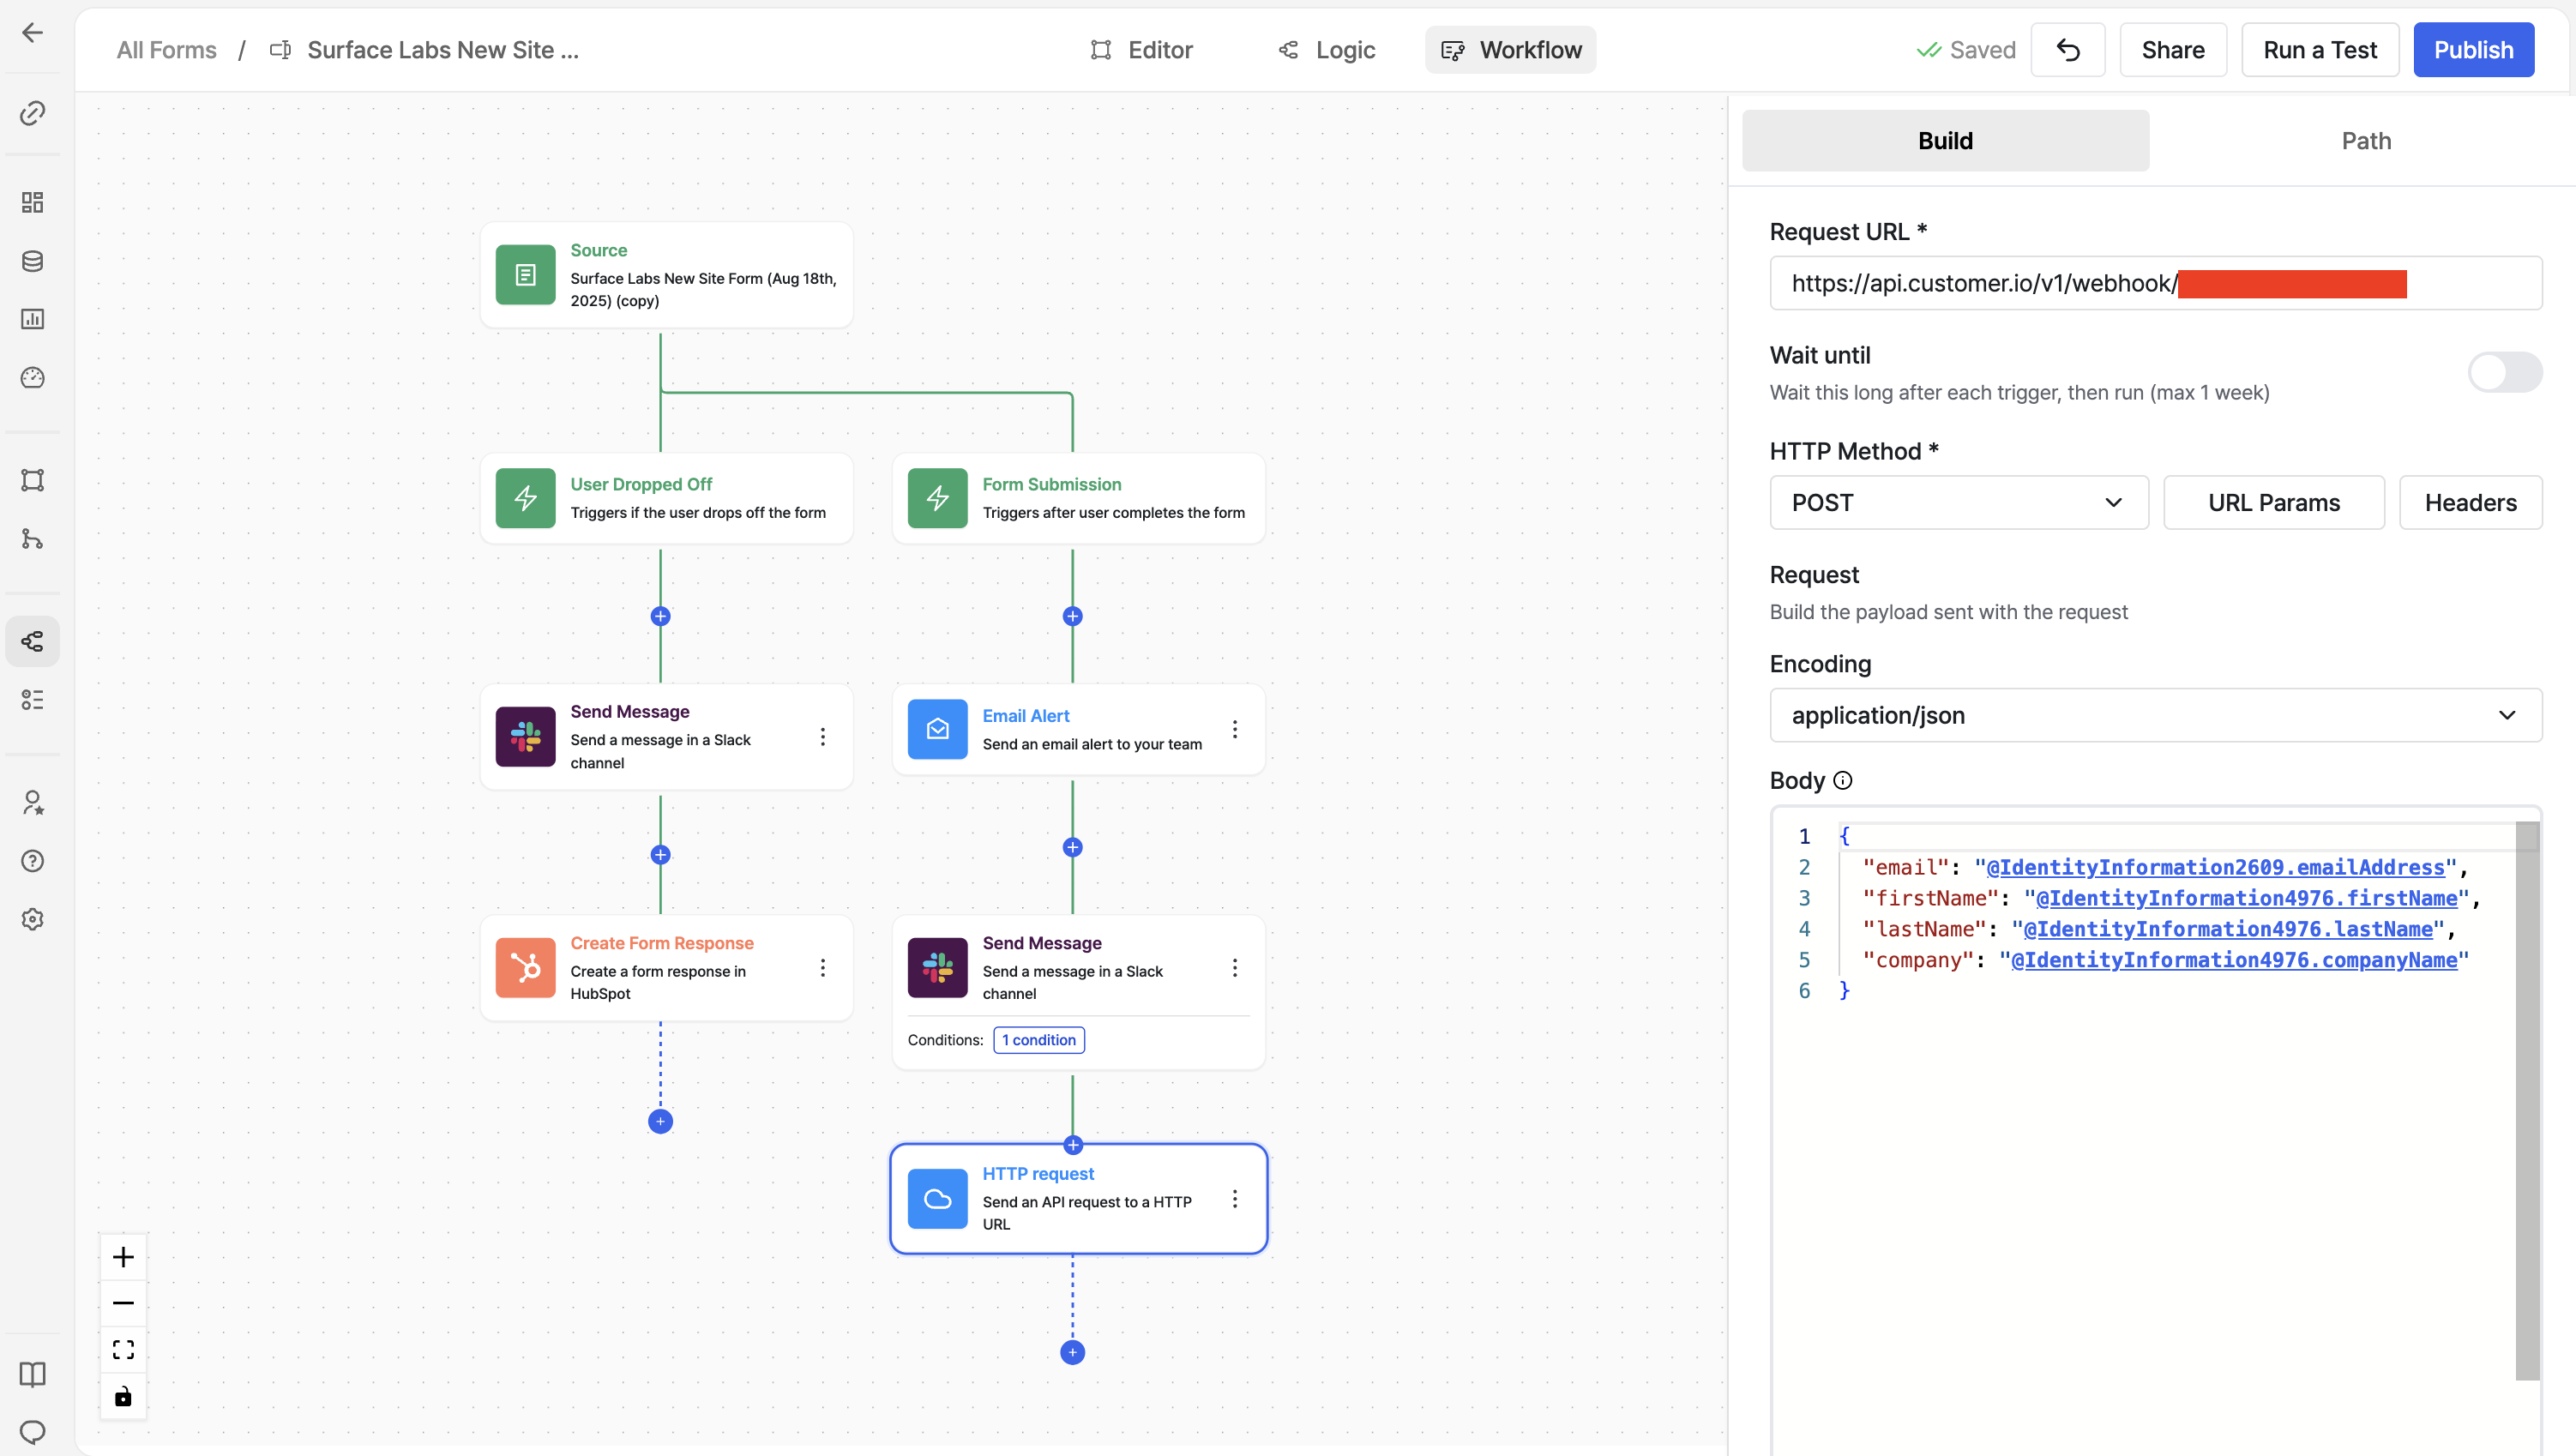
For each trigger path (Dropped Off and Form Submission):
-
Click the + button to add a new node
-
Select HTTP Request from the actions menu
-
In the configuration panel, set:
- Request URL:
- Dropped Off path → Paste the webhook URL from your partial Customer.io campaign
- Form Submission path → Paste the webhook URL from your completed Customer.io campaign
- HTTP Method:
POST - Body: Same payload for both paths (see below)
- Request URL:
Build the Webhook Payload
Use the @ symbol in the workflow builder to insert form variables. Your payload should include:
- Identifier (email) — required for Customer.io to create/update the person
- Any other fields you want to pass (name, form ID, etc.)
Use the same payload for both paths—the webhook URL determines which event fires in Customer.io.
Example payload:
{
  "email": "@email",
  "first_name": "@first_name",
  "last_name": "@last_name",
  "form_id": "@form_id",
  "submitted_at": "@submitted_at"
}
Replace @email, @first_name, etc. with the actual variable names from your form. Press @ in the workflow builder to see available fields.
Activate the Workflow
- Save the workflow
- Activate it so it runs when leads submit your form
- Test with a sample submission and verify the webhook reaches Customer.io
Verify in Customer.io
After a test submission:
- Check Customer.io Campaigns → your webhook campaigns → Logs to see if the webhook was received
- Check People to confirm the lead was created or updated
- Check that the correct event was recorded (
partialFormFilledfor Dropped Off,formCompletedfor Form Submission)
Next Step
Create the event-triggered email campaigns that will run when these events fire. See Step 3: Event-Based Email Campaigns.
Step 1: Webhook Trigger Campaigns
Create two webhook-triggered campaigns in Customer.io—one for partial submissions and one for completed—each with its own URL
Step 3: Event-Based Email Campaigns
Create event-triggered campaigns for partial and completed form submissions with customizable follow-up emails and delays