# Creating Your First Surface Form
## 1. Login to Surface Labs [#1-login-to-surface-labs]
Navigate to the [Surface Dashboard](https://app.withsurface.com/) and log in with your credentials.
## 2. Create a New Form [#2-create-a-new-form]
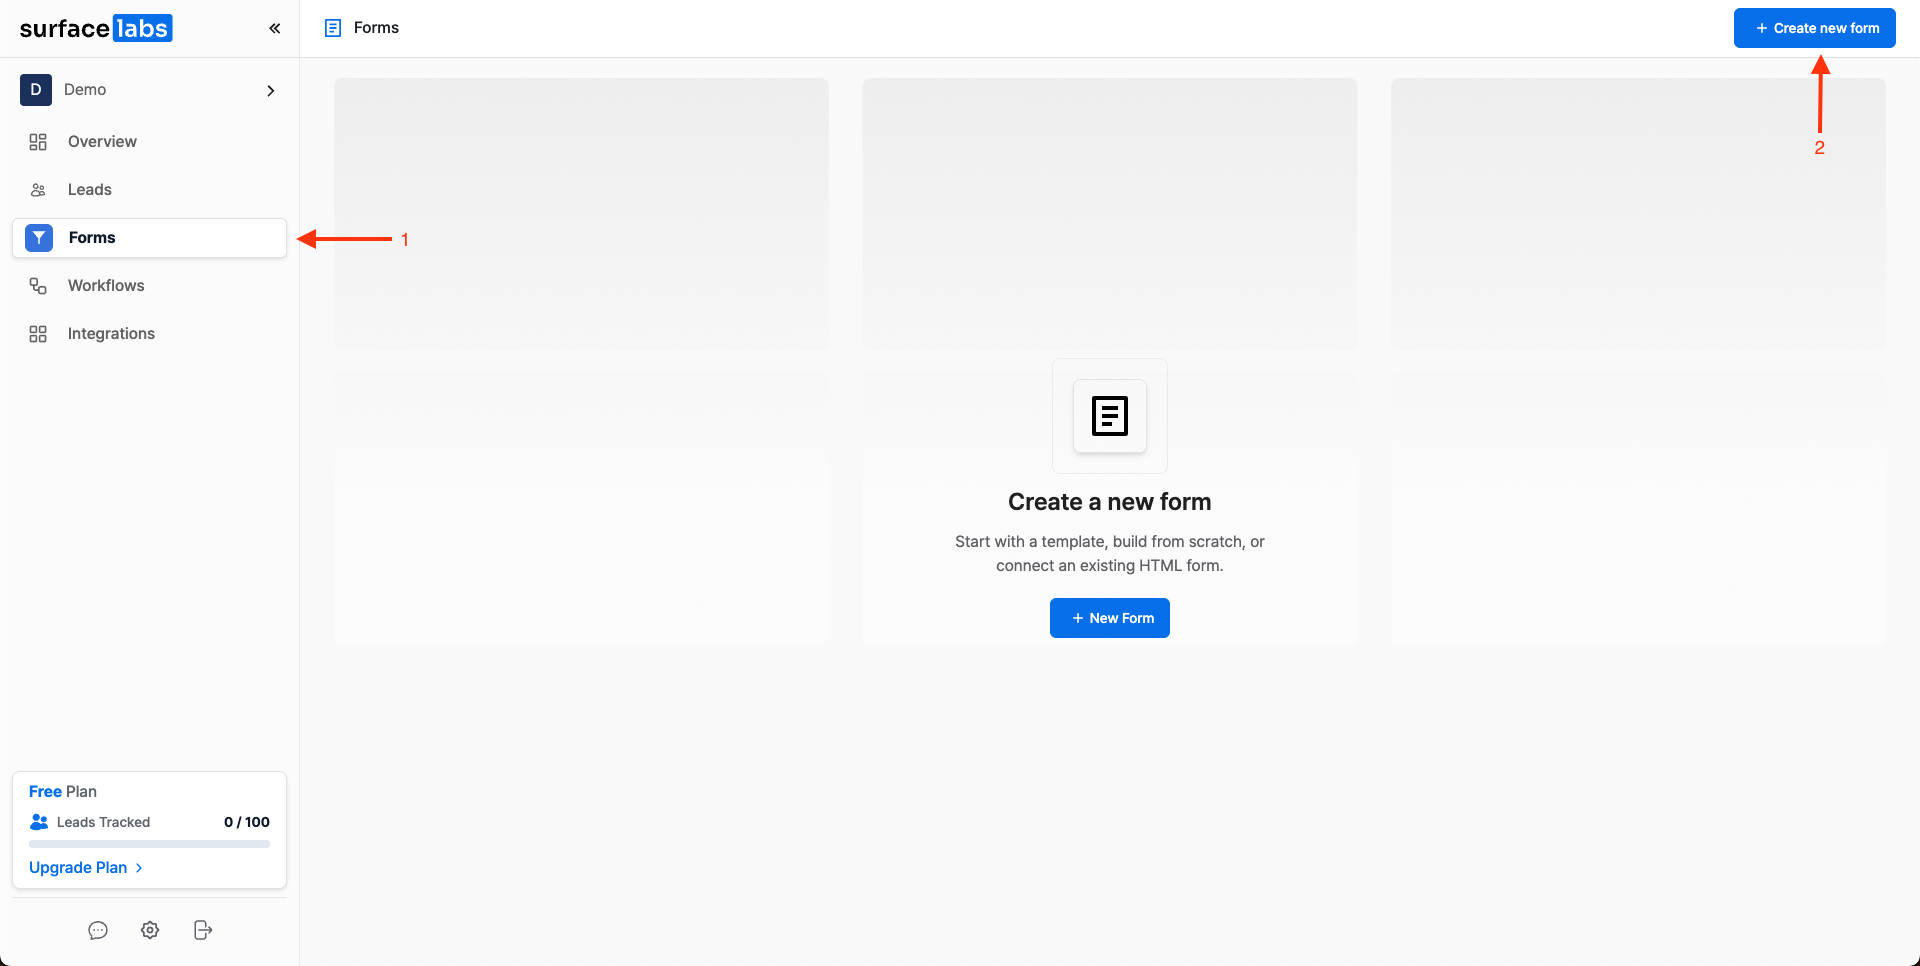 Go to the `Forms` tab and press `Create New Form` in the navigation bar.
### Start from Scratch or Choose a Template [#start-from-scratch-or-choose-a-template]
Go to the `Forms` tab and press `Create New Form` in the navigation bar.
### Start from Scratch or Choose a Template [#start-from-scratch-or-choose-a-template]
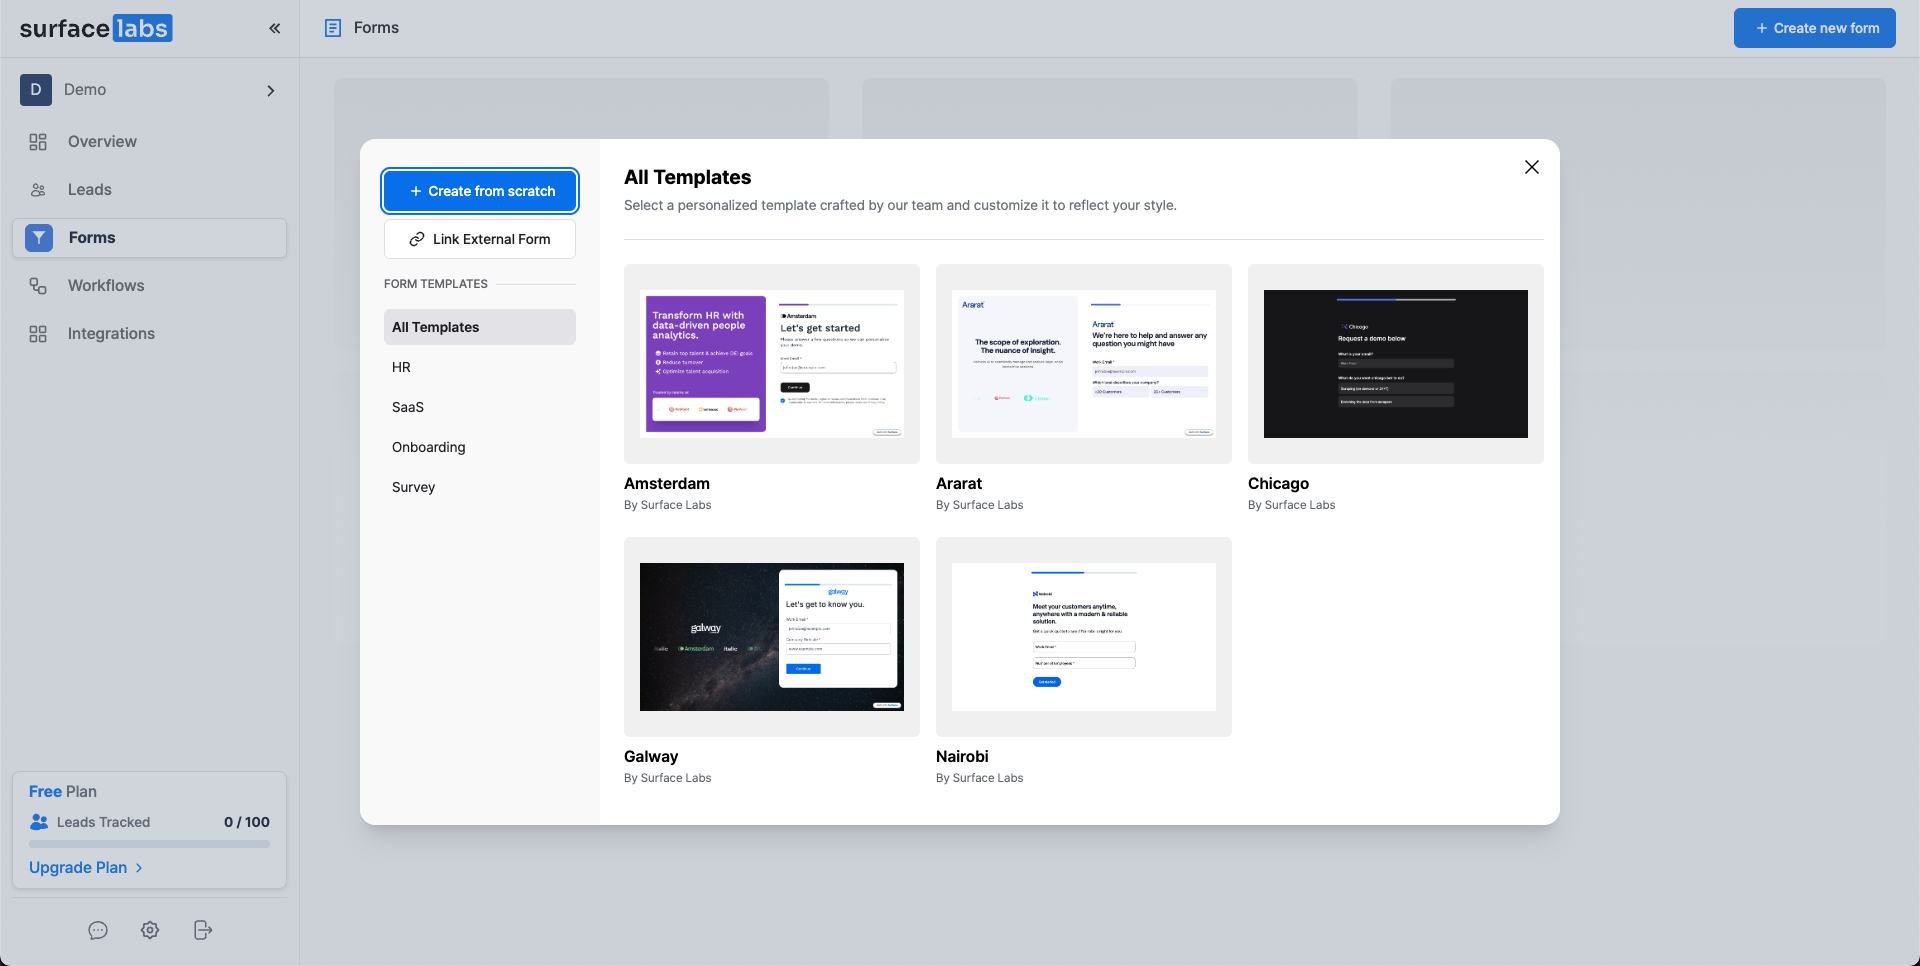 ## 3. Select a Layout [#3-select-a-layout]
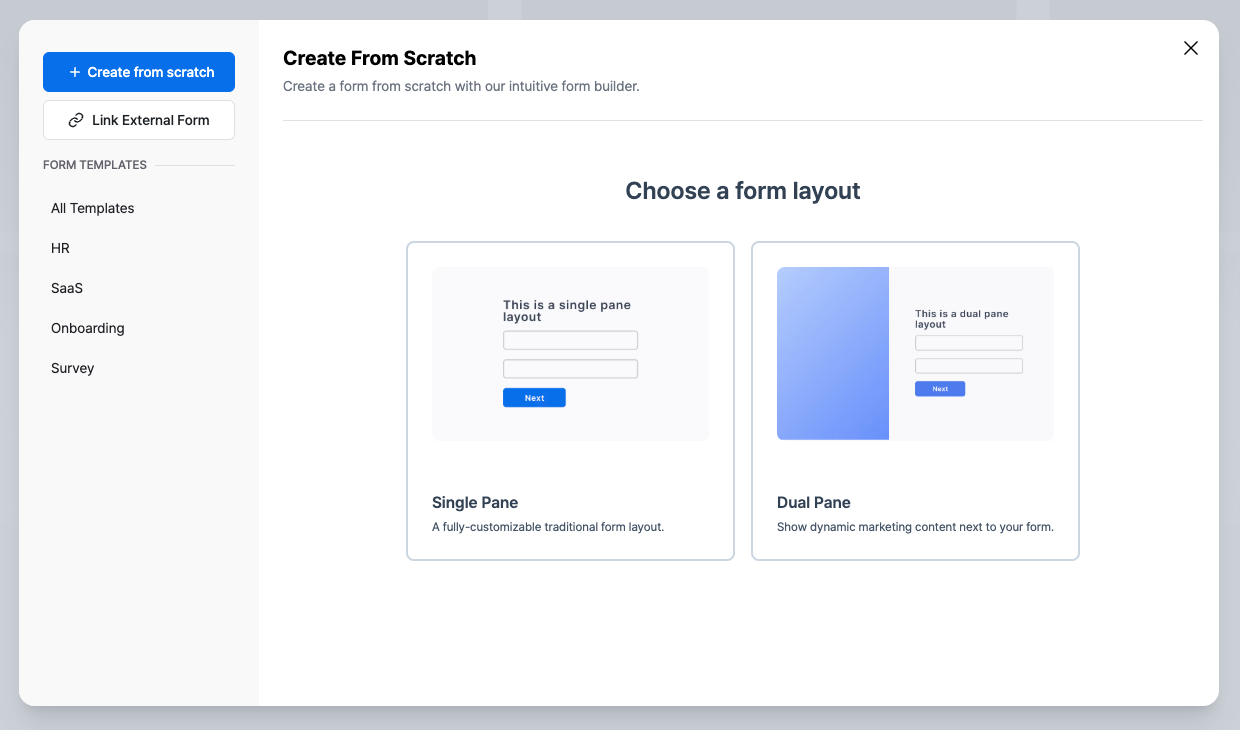 Choose a layout for your form from the following options:
* **Single Pane**: A simple form layout with a single column
* **Dual Pane**: A form layout with two columns, ideal for marketing purposes
## 4. Build the Form [#4-build-the-form]
### Overview [#overview]
Choose a layout for your form from the following options:
* **Single Pane**: A simple form layout with a single column
* **Dual Pane**: A form layout with two columns, ideal for marketing purposes
## 4. Build the Form [#4-build-the-form]
### Overview [#overview]
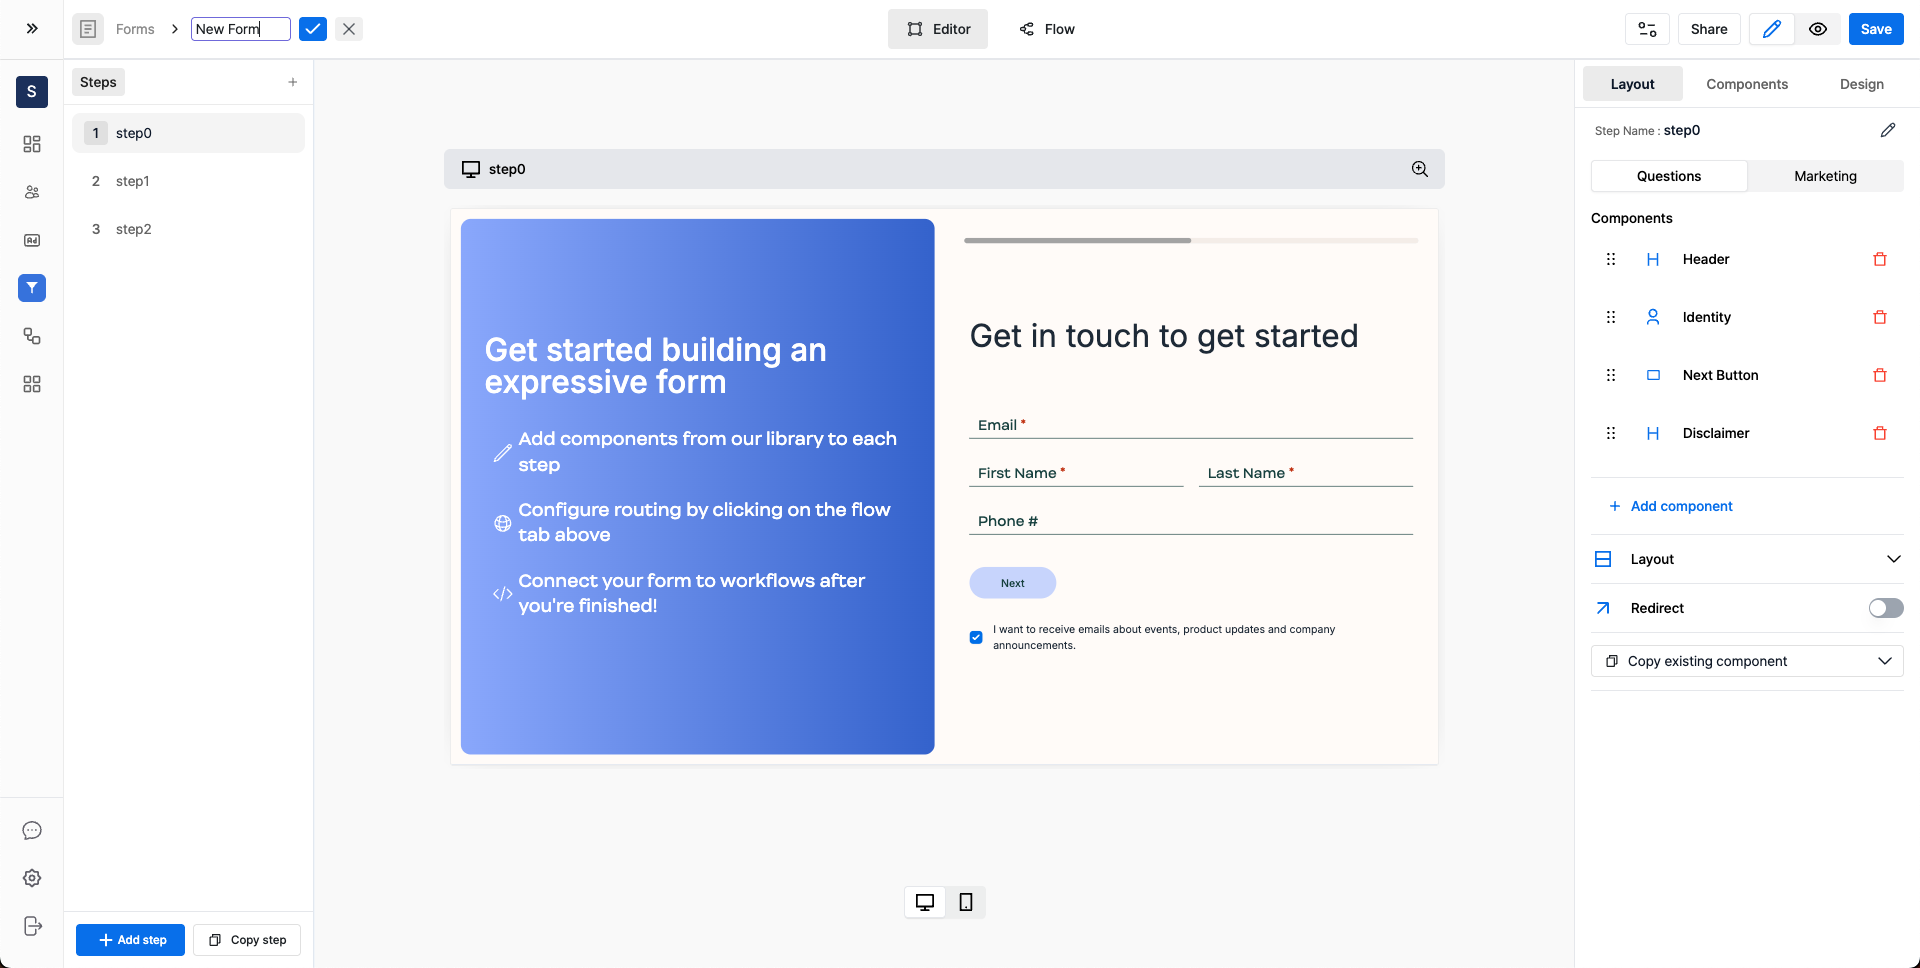 Surface Forms provides an initial template to start from. You can either edit the existing template or create a new one.
### Form Steps [#form-steps]
Surface Forms provides an initial template to start from. You can either edit the existing template or create a new one.
### Form Steps [#form-steps]
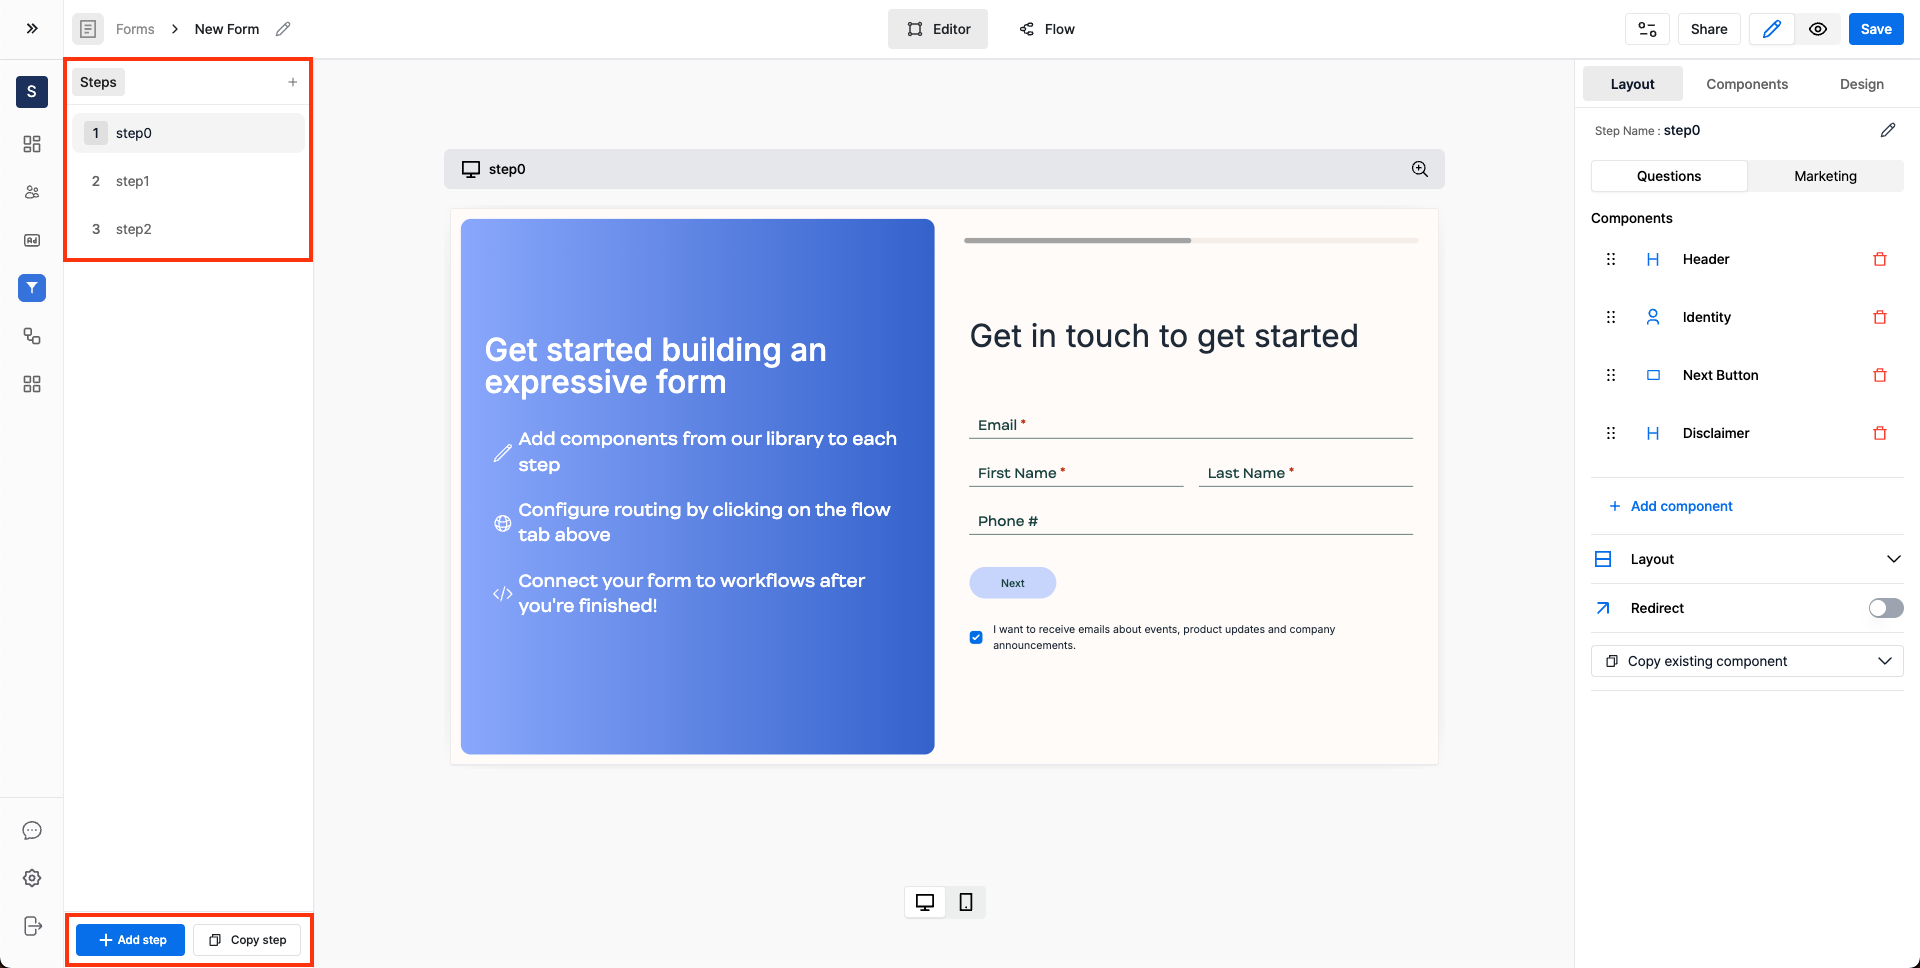 Form steps are listed on the left side of the form builder under the `Steps` section.
#### Add New Steps [#add-new-steps]
To add a new step, click on the `+ Add step` button or copy an existing step by clicking on the `Copy step` button.
### Edit the Step [#edit-the-step]
Form steps are listed on the left side of the form builder under the `Steps` section.
#### Add New Steps [#add-new-steps]
To add a new step, click on the `+ Add step` button or copy an existing step by clicking on the `Copy step` button.
### Edit the Step [#edit-the-step]
 #### Add New Components [#add-new-components]
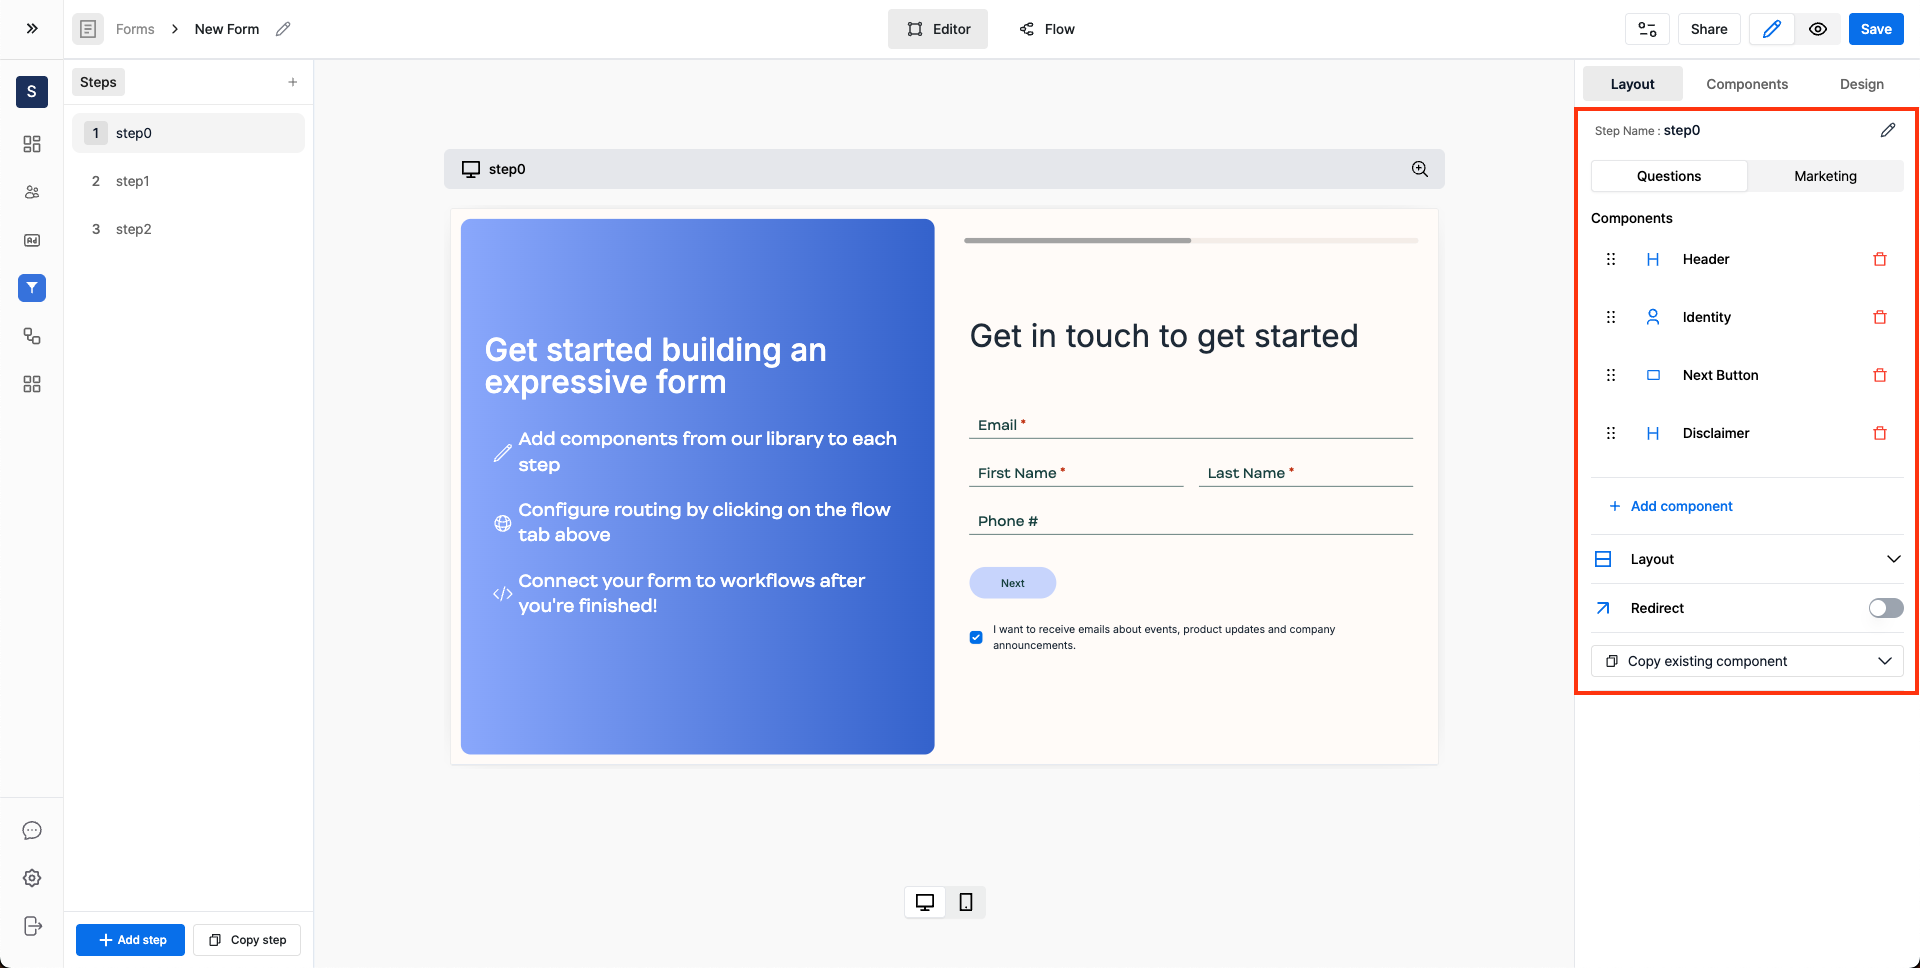
To add a new component, click on the `+ Add component` button or copy an existing component from the form by clicking on the `Copy existing component` button.
#### Question Pane and Marketing Pane [#question-pane-and-marketing-pane]
Each step is divided into two tabs: `Questions` and `Marketing`.
* The `Questions` tab is used to add questions such as text fields, dropdowns, multiple choice questions, etc to the form.
* The `Marketing` tab is for adding marketing components such as a logo, background image, etc to the form.
### Customize Layout [#customize-layout]
#### Question Pane Layout Customization [#question-pane-layout-customization]
#### Add New Components [#add-new-components]
To add a new component, click on the `+ Add component` button or copy an existing component from the form by clicking on the `Copy existing component` button.
#### Question Pane and Marketing Pane [#question-pane-and-marketing-pane]
Each step is divided into two tabs: `Questions` and `Marketing`.
* The `Questions` tab is used to add questions such as text fields, dropdowns, multiple choice questions, etc to the form.
* The `Marketing` tab is for adding marketing components such as a logo, background image, etc to the form.
### Customize Layout [#customize-layout]
#### Question Pane Layout Customization [#question-pane-layout-customization]
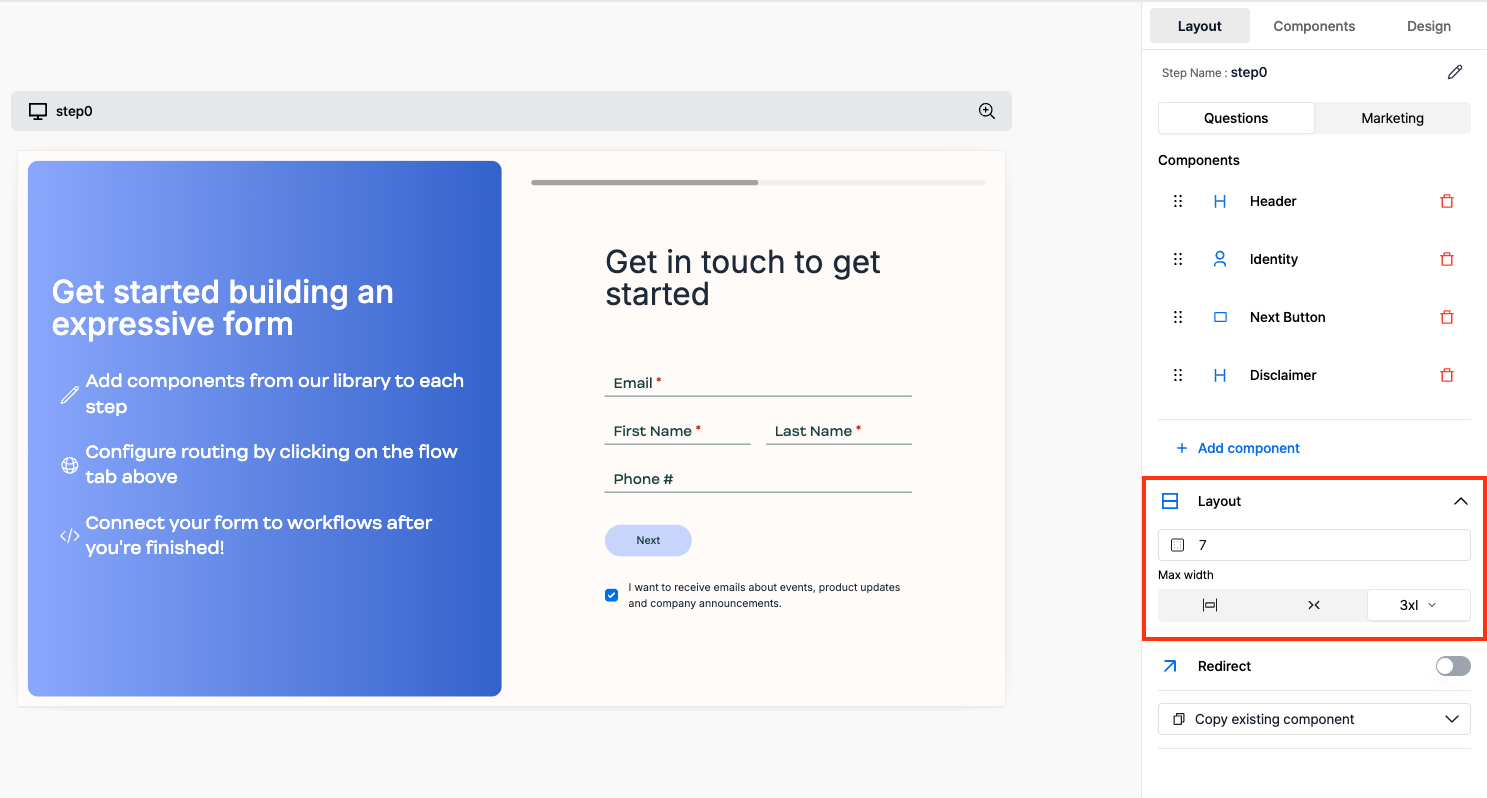 Both the `Questions` and `Marketing` panels have layout customization options. Some of the customization options include:
* `Horizontal Padding`
* `Maximum Width of the Pane`
#### Marketing Pane Layout Customization [#marketing-pane-layout-customization]
Both the `Questions` and `Marketing` panels have layout customization options. Some of the customization options include:
* `Horizontal Padding`
* `Maximum Width of the Pane`
#### Marketing Pane Layout Customization [#marketing-pane-layout-customization]
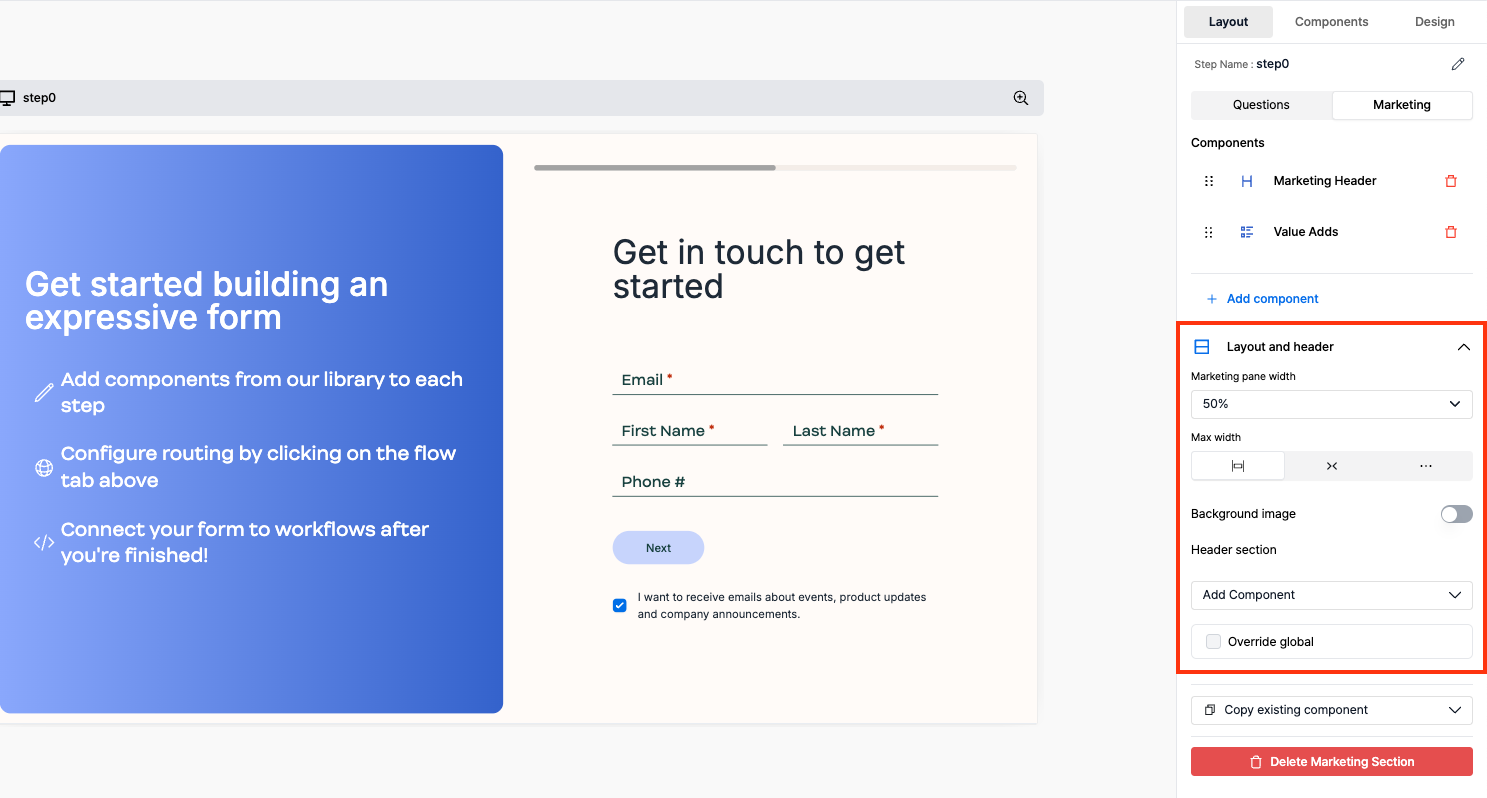 The marketing pane offers additional customization options:
1. Customize the `Marketing Pane` width
2. Add a `Background Image`
3. Add a `Logo` in the header:
* Expand the `Add Component` dropdown and select the `Image` component to add a logo in the marketing header
### Edit a Component [#edit-a-component]
The marketing pane offers additional customization options:
1. Customize the `Marketing Pane` width
2. Add a `Background Image`
3. Add a `Logo` in the header:
* Expand the `Add Component` dropdown and select the `Image` component to add a logo in the marketing header
### Edit a Component [#edit-a-component]
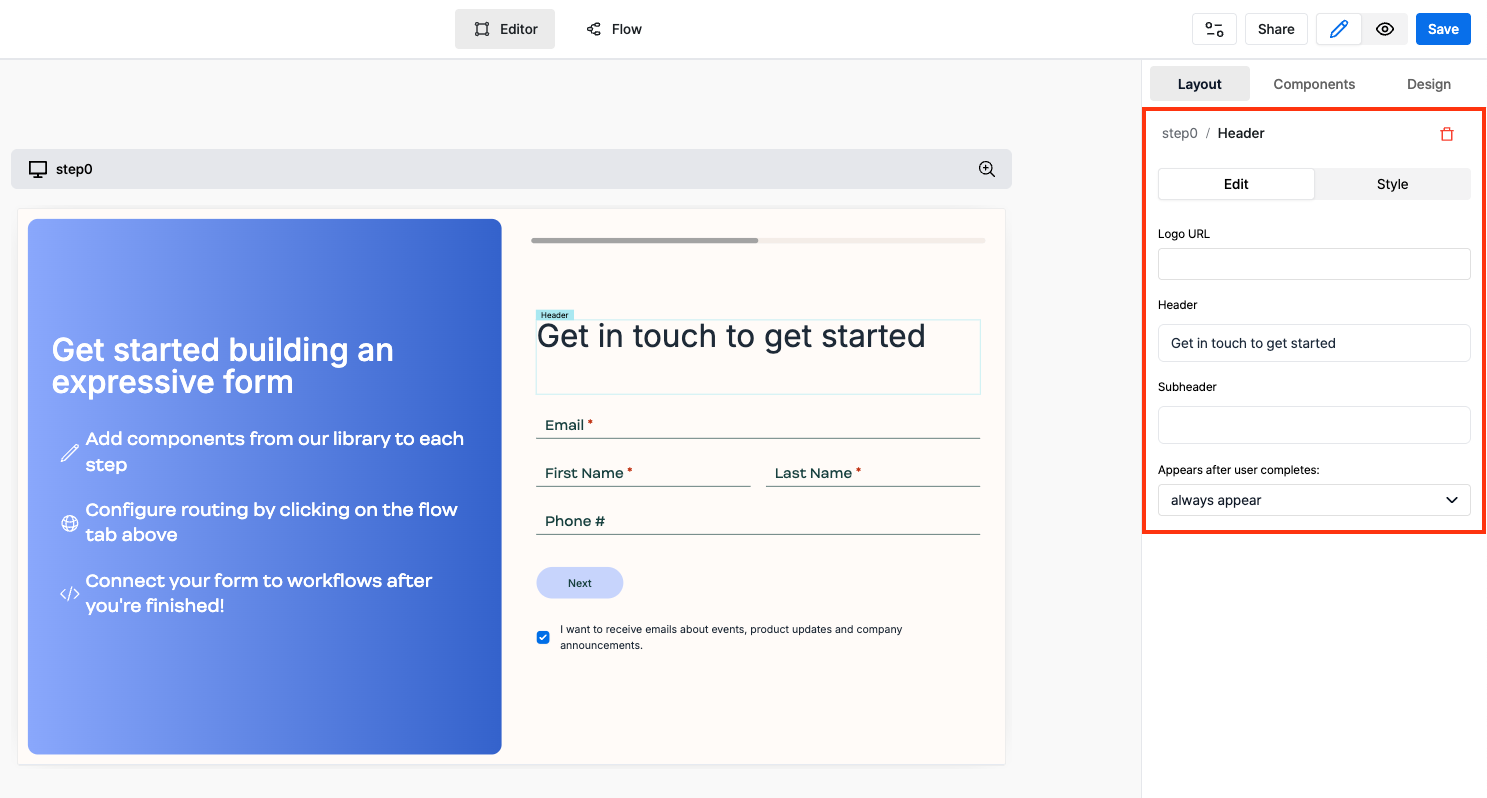 To edit a component, either click on the component directly from the form preview or click on the component from the components list in the right side panel.
### Style a Component [#style-a-component]
To edit a component, either click on the component directly from the form preview or click on the component from the components list in the right side panel.
### Style a Component [#style-a-component]
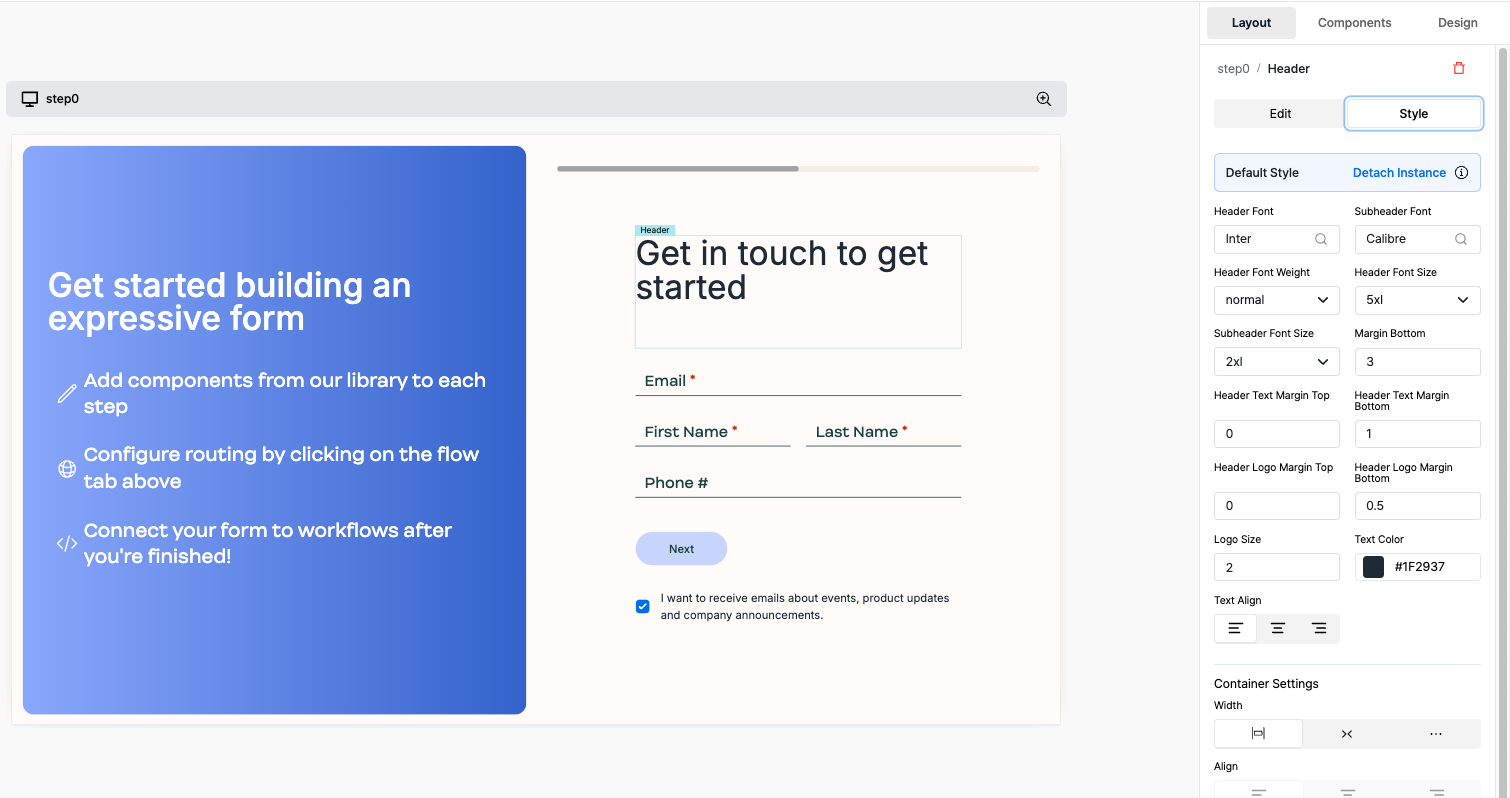 Each component has a `Style` panel for customization. Different components have different style options.
Some of the available style options include:
* `Background Color`
* `Text Color`
* `Border Color`
* `Border Width`
* `Border Radius`
* `Box Shadow`
### Advanced Features [#advanced-features]
#### Customize Marketing Pane globally [#customize-marketing-pane-globally]
Each component has a `Style` panel for customization. Different components have different style options.
Some of the available style options include:
* `Background Color`
* `Text Color`
* `Border Color`
* `Border Width`
* `Border Radius`
* `Box Shadow`
### Advanced Features [#advanced-features]
#### Customize Marketing Pane globally [#customize-marketing-pane-globally]
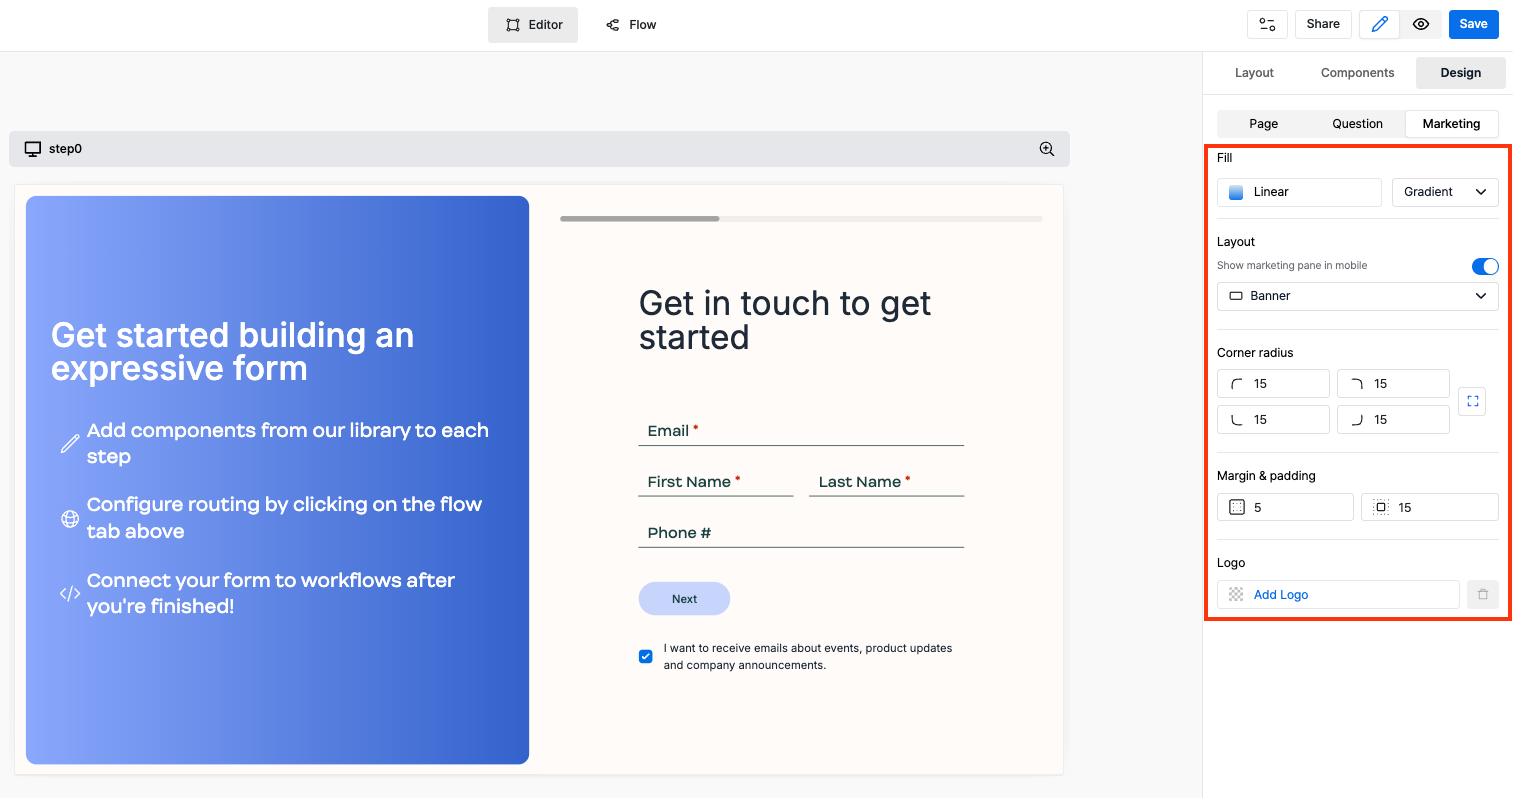 To customize the marketing pane globally, go to the `Marketing` under `Design` section.
Some of the customization options include:
* `Fill`: Choose from a range of options like gradient, solid color, image, etc for the background of the marketing pane.
* `Corner Radius`: Control the corner radius of the marketing pane.
* `Logo`: Add a logo to the marketing pane.
#### Delete Marketing Pane for a particular step [#delete-marketing-pane-for-a-particular-step]
To customize the marketing pane globally, go to the `Marketing` under `Design` section.
Some of the customization options include:
* `Fill`: Choose from a range of options like gradient, solid color, image, etc for the background of the marketing pane.
* `Corner Radius`: Control the corner radius of the marketing pane.
* `Logo`: Add a logo to the marketing pane.
#### Delete Marketing Pane for a particular step [#delete-marketing-pane-for-a-particular-step]
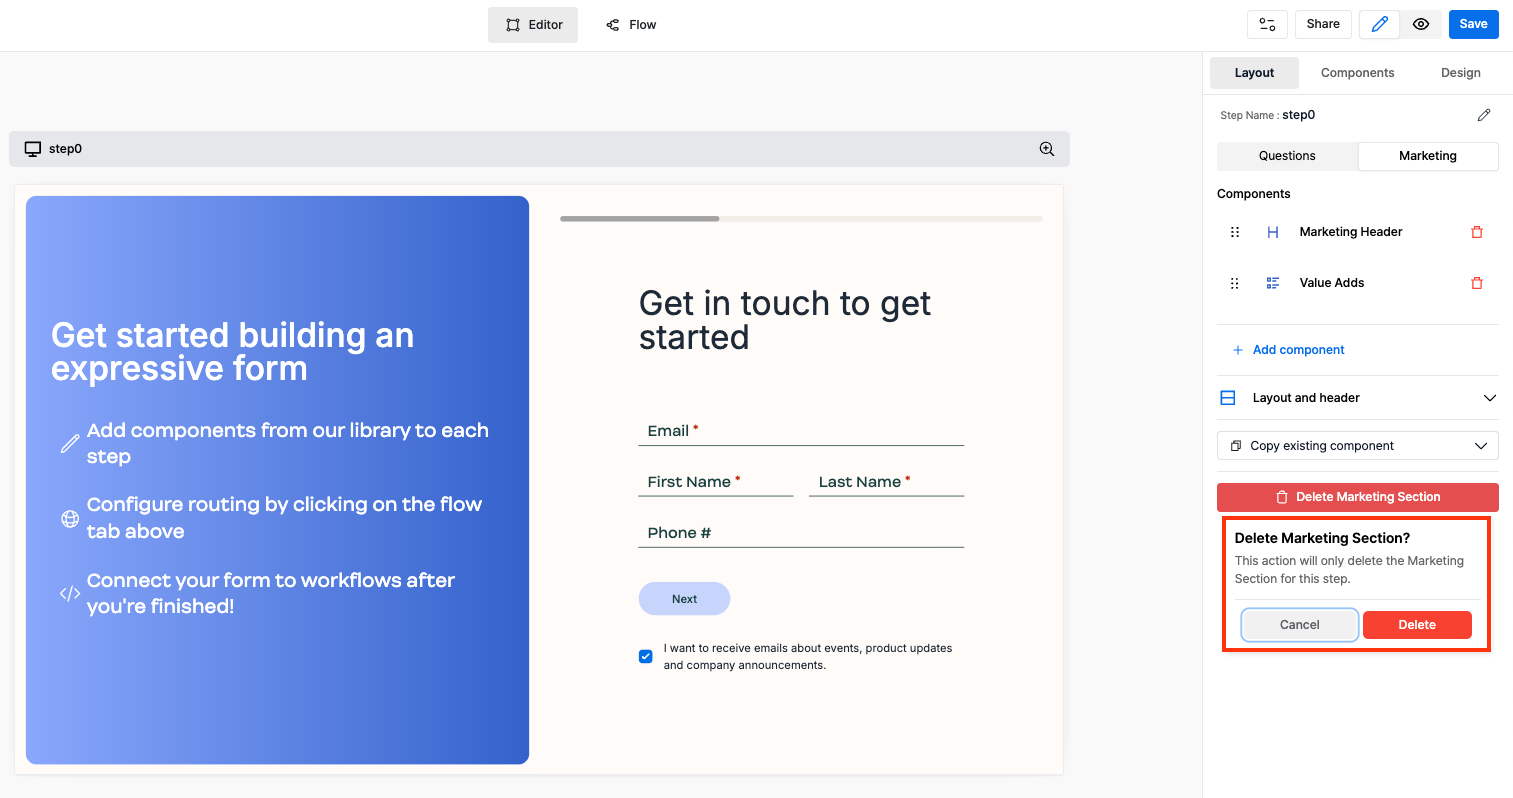 To delete the marketing pane for a particular step, go to the `Marketing` under `Layout` section and click on the `Delete Marketing Section` button.
## 5. Save and Share [#5-save-and-share]
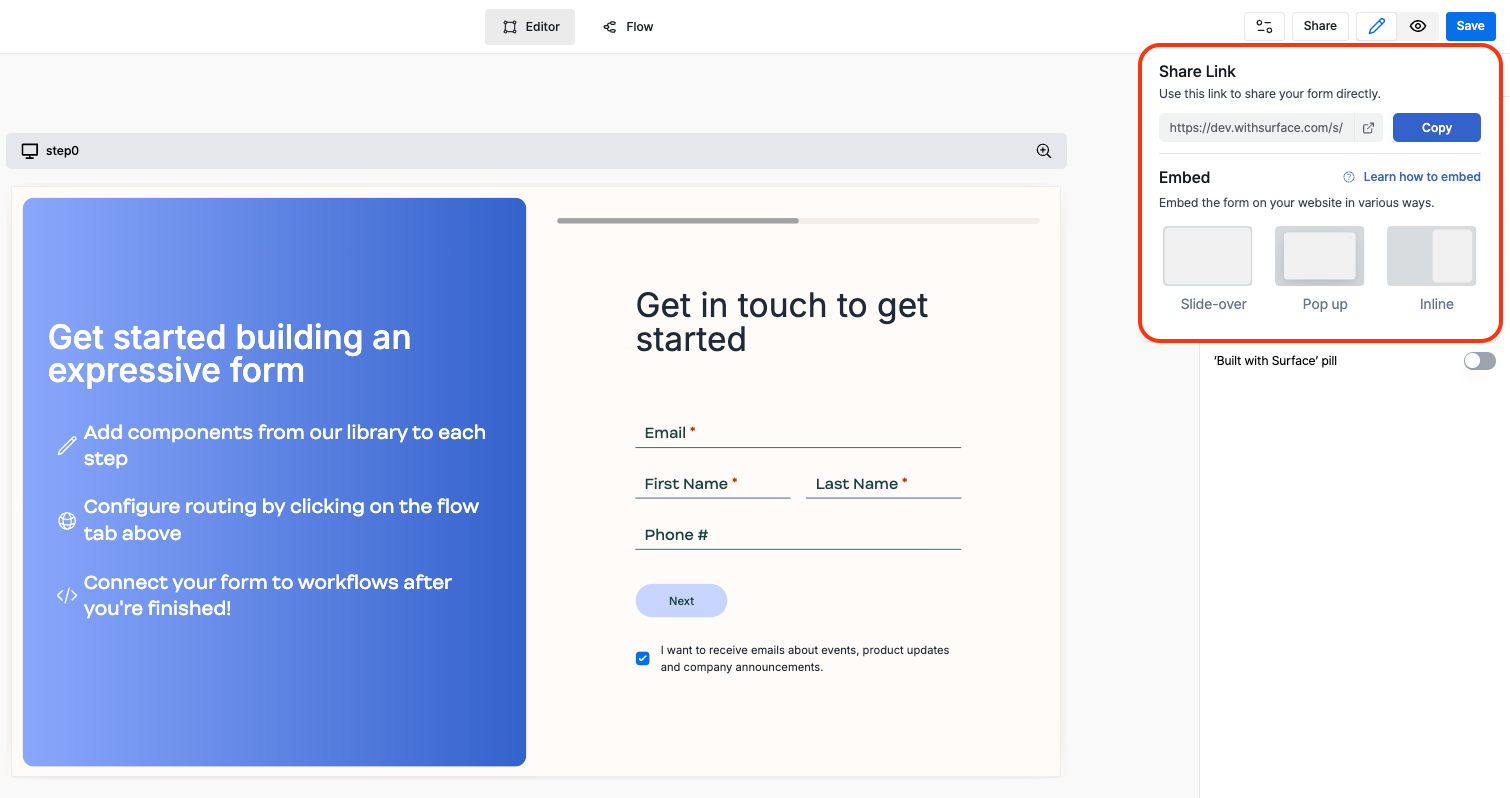
Change the form name in the navigation bar and save the form by clicking on the `Save` button.
Share the form using the `Share` button in the navigation bar.
* You can share the form using the `Share Link` or `Embed Code` to embed the form on your website.
To delete the marketing pane for a particular step, go to the `Marketing` under `Layout` section and click on the `Delete Marketing Section` button.
## 5. Save and Share [#5-save-and-share]
Change the form name in the navigation bar and save the form by clicking on the `Save` button.
Share the form using the `Share` button in the navigation bar.
* You can share the form using the `Share Link` or `Embed Code` to embed the form on your website.
 Read more about how to [embed a Surface Form](/guides/embedding/website-editors) on your site.