# Slideover
This feature requires paid tier of framer!
## Create Surface Constructor [#create-surface-constructor]
1. In Framer, go to project `settings`.
2. Scroll down to `Custom Code` section.
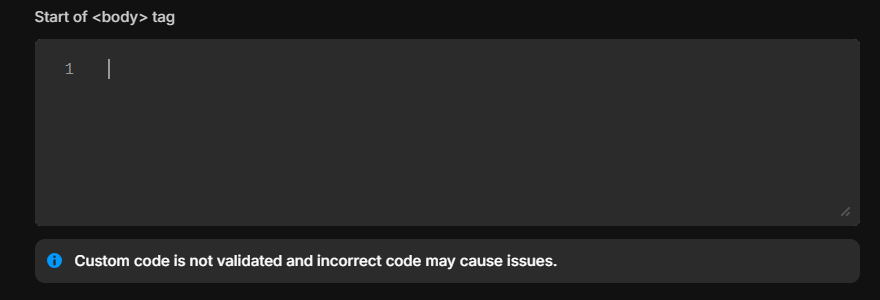 Add the following code in the `End of tag` section.
```html
```
## Add className to the target element [#add-classname-to-the-target-element]
Select the button or element where you want to trigger the form. Open the `properties` of the element and scroll down to `Code Overrides` section.
1. Click on `New File` under `File` selection menu. Name it `SurfaceFormButton`.
Add the following code in the `End of tag` section.
```html
```
## Add className to the target element [#add-classname-to-the-target-element]
Select the button or element where you want to trigger the form. Open the `properties` of the element and scroll down to `Code Overrides` section.
1. Click on `New File` under `File` selection menu. Name it `SurfaceFormButton`.
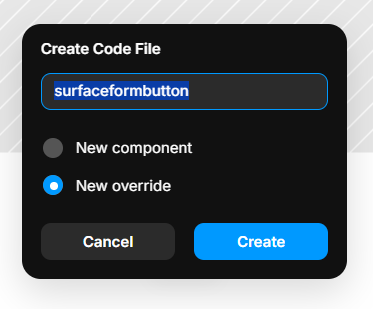 2. Rename the file and click on `Create`.
3. In the code editor, go to the very bottom, add a new line, and paste the following code:
```tsx
export function withClass(Component): ComponentType {
return (props) => {
props.className += " surface-form-button" // Remember to add a space
return
}
}
```
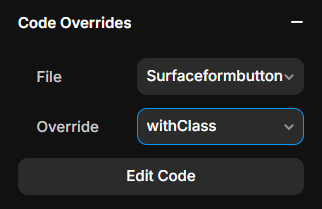
4. Now go back to the element, In `File` selection menu, select `SurfaceFormButton` in the first dropdown and select `withClass` from the `Override` selection menu.
2. Rename the file and click on `Create`.
3. In the code editor, go to the very bottom, add a new line, and paste the following code:
```tsx
export function withClass(Component): ComponentType {
return (props) => {
props.className += " surface-form-button" // Remember to add a space
return
}
}
```
4. Now go back to the element, In `File` selection menu, select `SurfaceFormButton` in the first dropdown and select `withClass` from the `Override` selection menu.
 ## Publish the site [#publish-the-site]
Publish the site and that's it! You have successfully embedded a Surface Form in your Framer project.
## Publish the site [#publish-the-site]
Publish the site and that's it! You have successfully embedded a Surface Form in your Framer project.